
The Step-by-Step Guide for Installing a Ranch Hand Bumper on Your Truck
- Bumper
- Hardware bag (provided)
- Installation instructions (provided)
- Power ratchet (air or battery-powered)
- Socket set (standard and metric)
- Impact wrench (air or battery-powered)
- Impact socket set (standard and metric)
- Torque wrench
- Breaker bar (optional)
- Floor jack
- Hydraulic engine lift (optional)
- Jack stands
- Floor creeper
- Pry bar
- Plastic zip ties
- Snips
- Spray lubricant or catalyst (for old, rusted bolts)
- Extra people for help
- Protective glasses
- Gloves
-
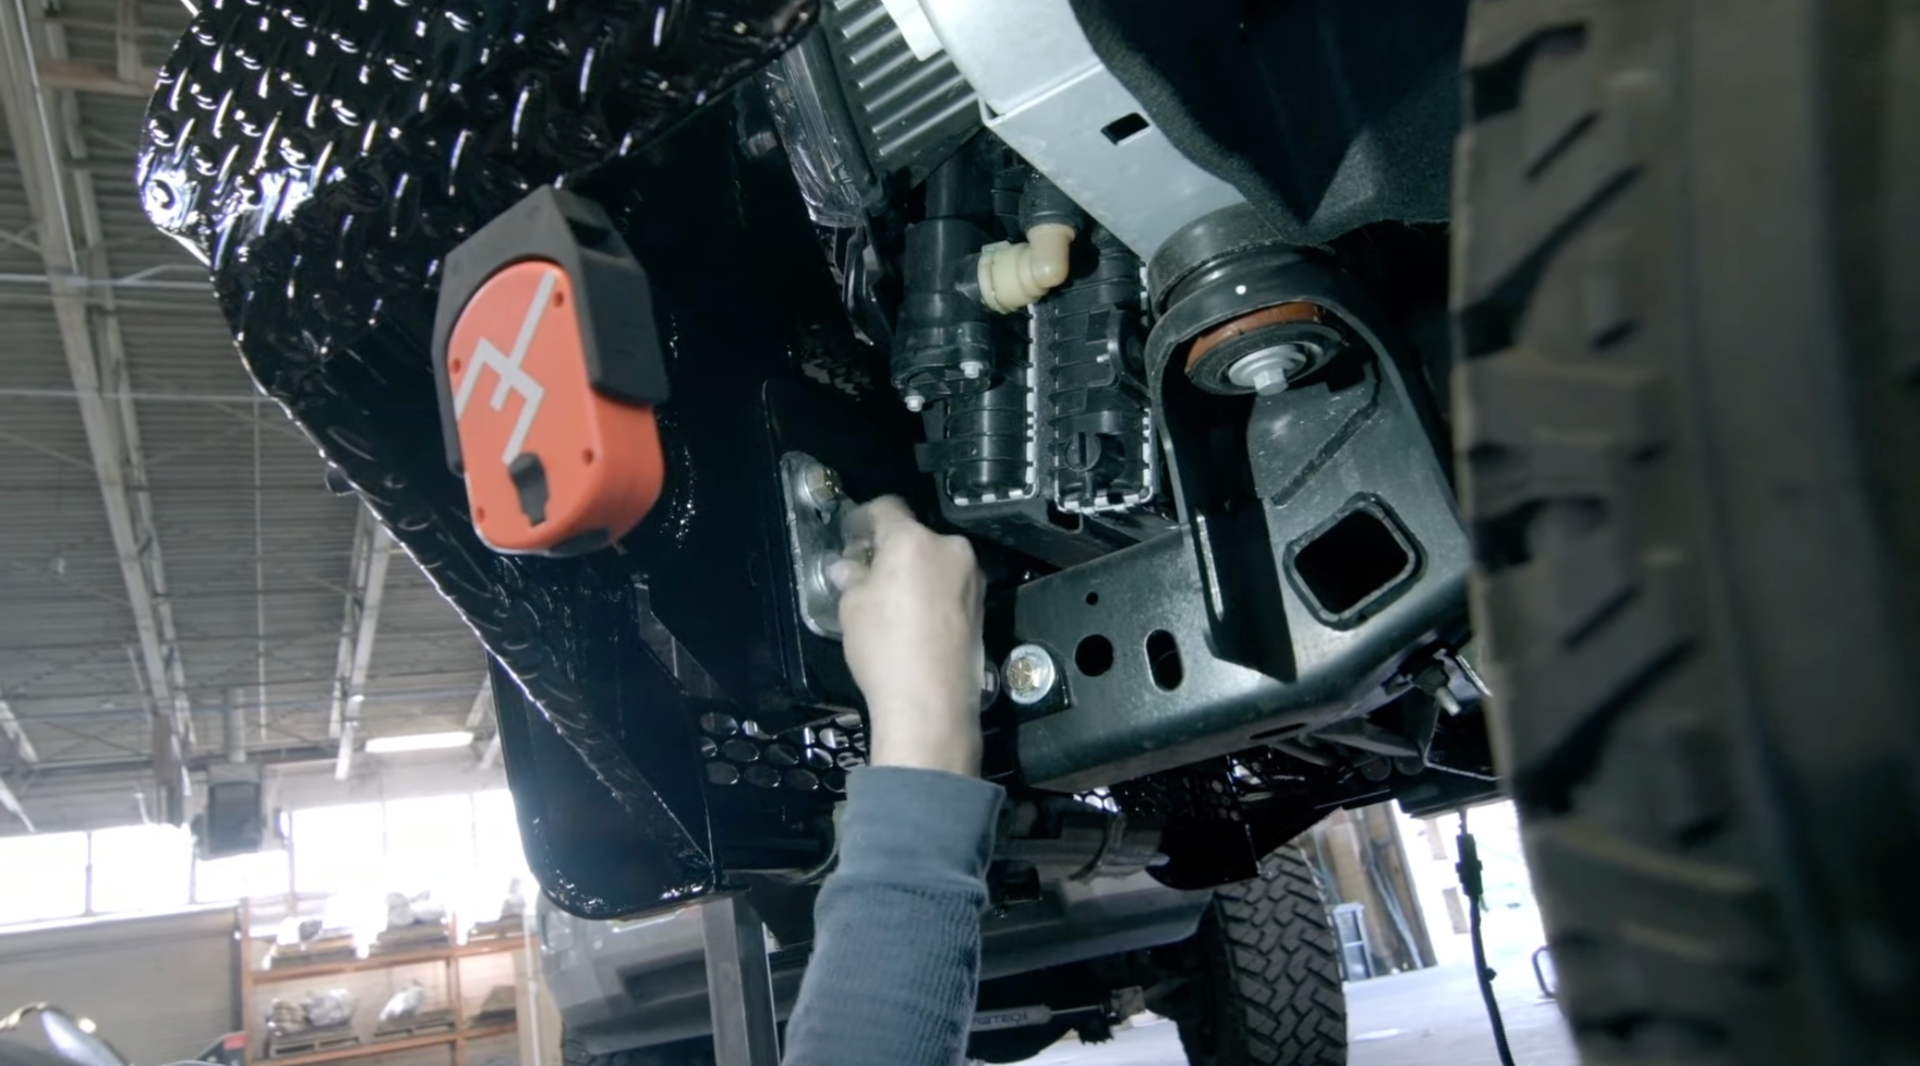
Locate the factory bumper support brackets, located on the inside of the wheel wells
Your front bumper will typically have two bumper support brackets on the front, on the driver and passenger and driver sides. Find the location of these mounting points, typically located in the wheel wells. In these two locations, there are typically 2 or 3 bolts. Use your socket set or wrench set to determine the correct size of these bolts and inspect for rust or corrosion. If rust or corrosion is present, you may want to spray a penetrating oil or catalyst prior to loosening to prevent stripping.
-
Locate the wiring harness for the factory (or aftermarket) running lights beneath the front bumper
Most trucks will have factory running lights in the front bumper and some may even have aftermarket LED lights. Locate the wiring harness for these lights and disconnect before removing the bumper. The factory wiring harness will have an OEM-style plug that snaps together. To unplug this, find the release clip and press using your hand or a screwdriver while pulling both ends of the plastic plug apart. For aftermarket lights, you may remove the wiring at the light itself or at the power source. Be careful when disconnecting the lights to ensure the wires are not damaged so they will work once reinstalled.
-
Remove the plastic covers that surround the tow hooks in the front of the bumper
These should remove easily by hand. Be careful not to force these plastic covers out of the bumper so that they can be reinstalled later.
-
Support the front bumper with a floor jack or have a friend help
Next, you will need to make sure your factory bumper is secure and steady before you loosen up the bolts to remove it. Be sure to have a floor jack or have a friend help to support the bumper before loosening the bolts to avoid the bumper abruptly falling. -
Remove the eight bolts from the front end that surround the tow hooks
Use an impact wrench or a breaker bar to loosen the eight bolts on the driver and passenger sides of the front bumper. Do not fully remove them. Loosen each bolt slowly but allow the bumper to remain in place.
If your truck doesn't have tow hooks, there will still be 4 bolts that hold the bumper in place on both the driver and passenger sides. Be sure to slowly loosen these only when the bumper is supported.
Finish loosening the bolts to remove them. The bumper will drop and then you can separate the bumper from the truck and set it aside. -
Remove the mounting brackets, tow hooks and Crash bucket bracket
Use your impact wrench or power ratchet to remove the 4 bolts from each side that hold your bumper brackets and tow hooks in place. Hold onto the mounting bracket, as itwill be used along with the new Ranch Hand mounting brackets. Next, remove the 4 bolts that hold on each crash bucket bracket. Keep the factory tow hooks and mounting brackets handy as they will be reinstalled later.
-
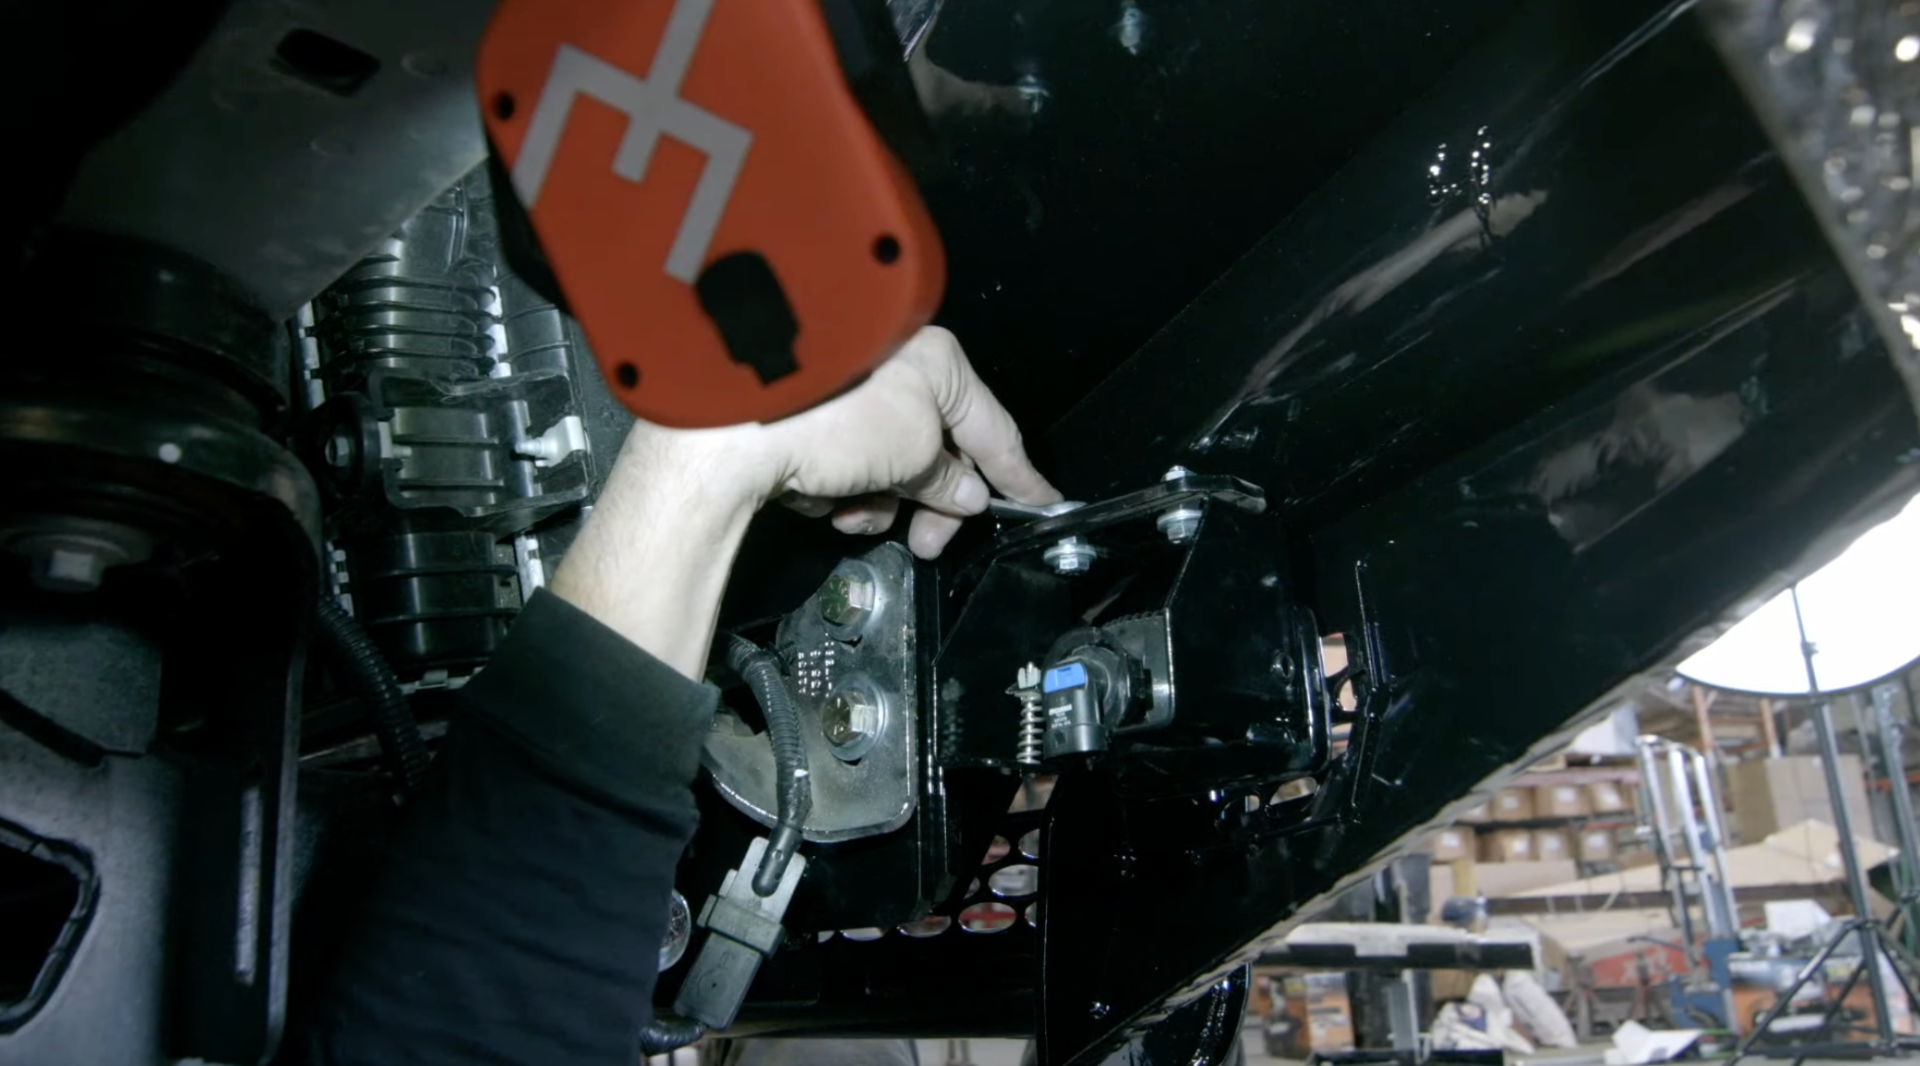
Slide the factory mounting bracket into the ranch hand mounting bracket and reinstall
The factory mounting bracket will be retained for use with the Ranch Hand mounting bracket. Simply slide the factory mounting bracket into the Ranch Hand mounting bracket, from the back side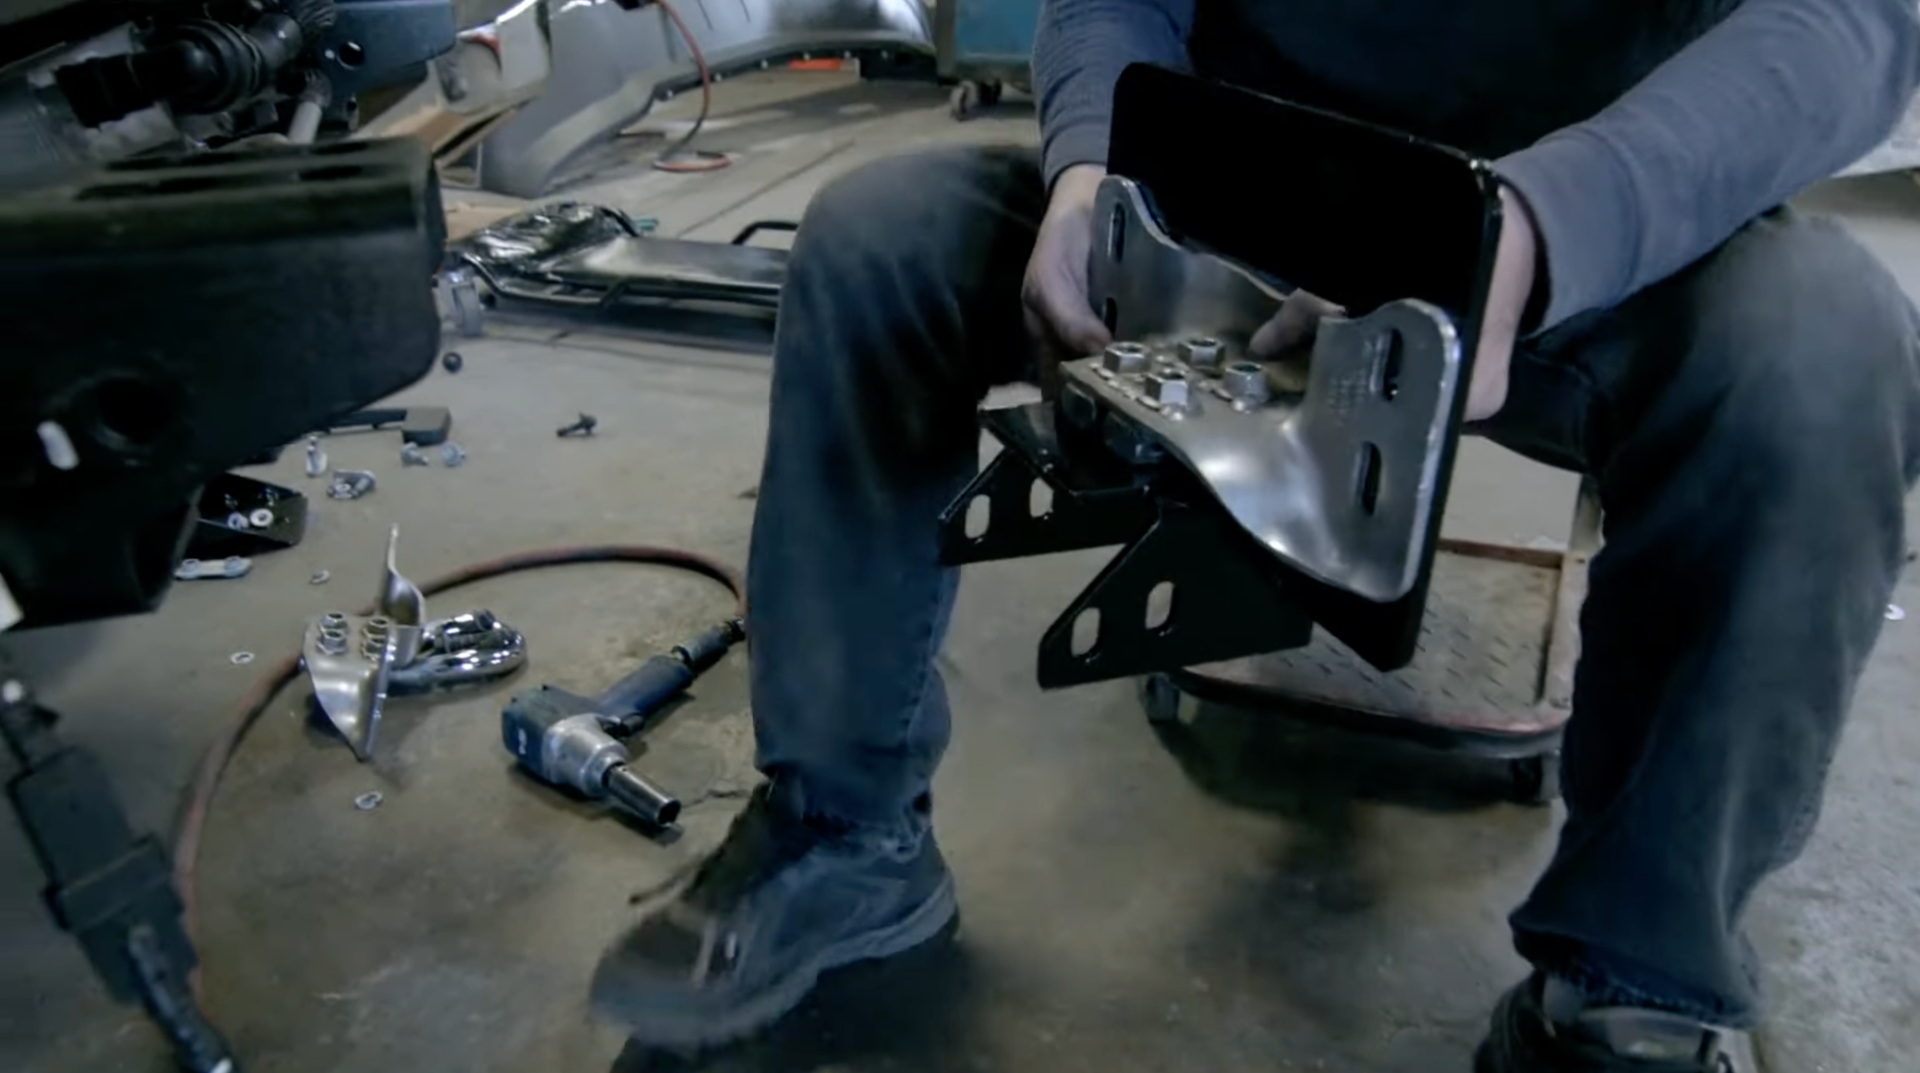
Place the combination back onto the truck frame horn and use the four bolts previously removed to reinstall the mounting bracket combination on both the driver and passenger sides.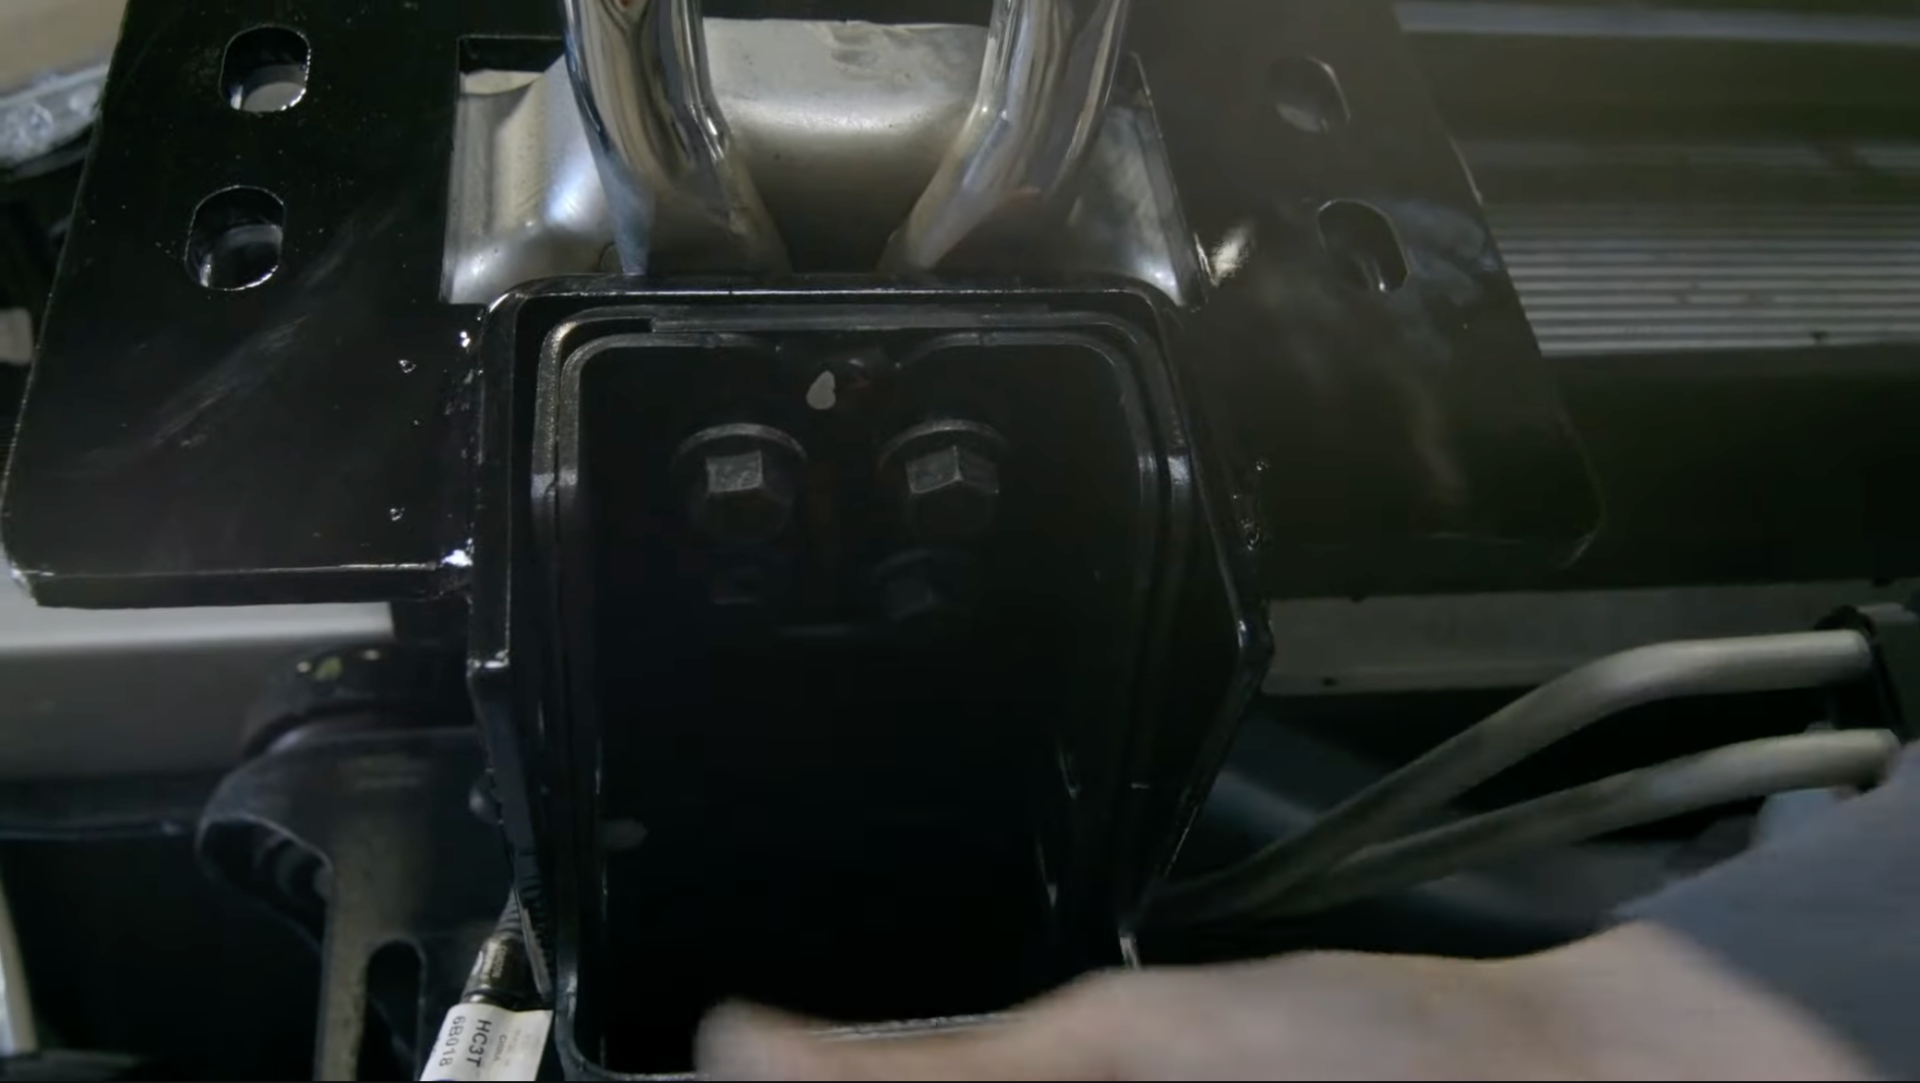
Next, use the eight provided grade-A bolts that were included in the hardware kit and bolt down the sides of the mounting brackets. The driver and passeger sides will each have four bolts. Secure all bolts with an impact wrench to ensure they are tighly installed and secure.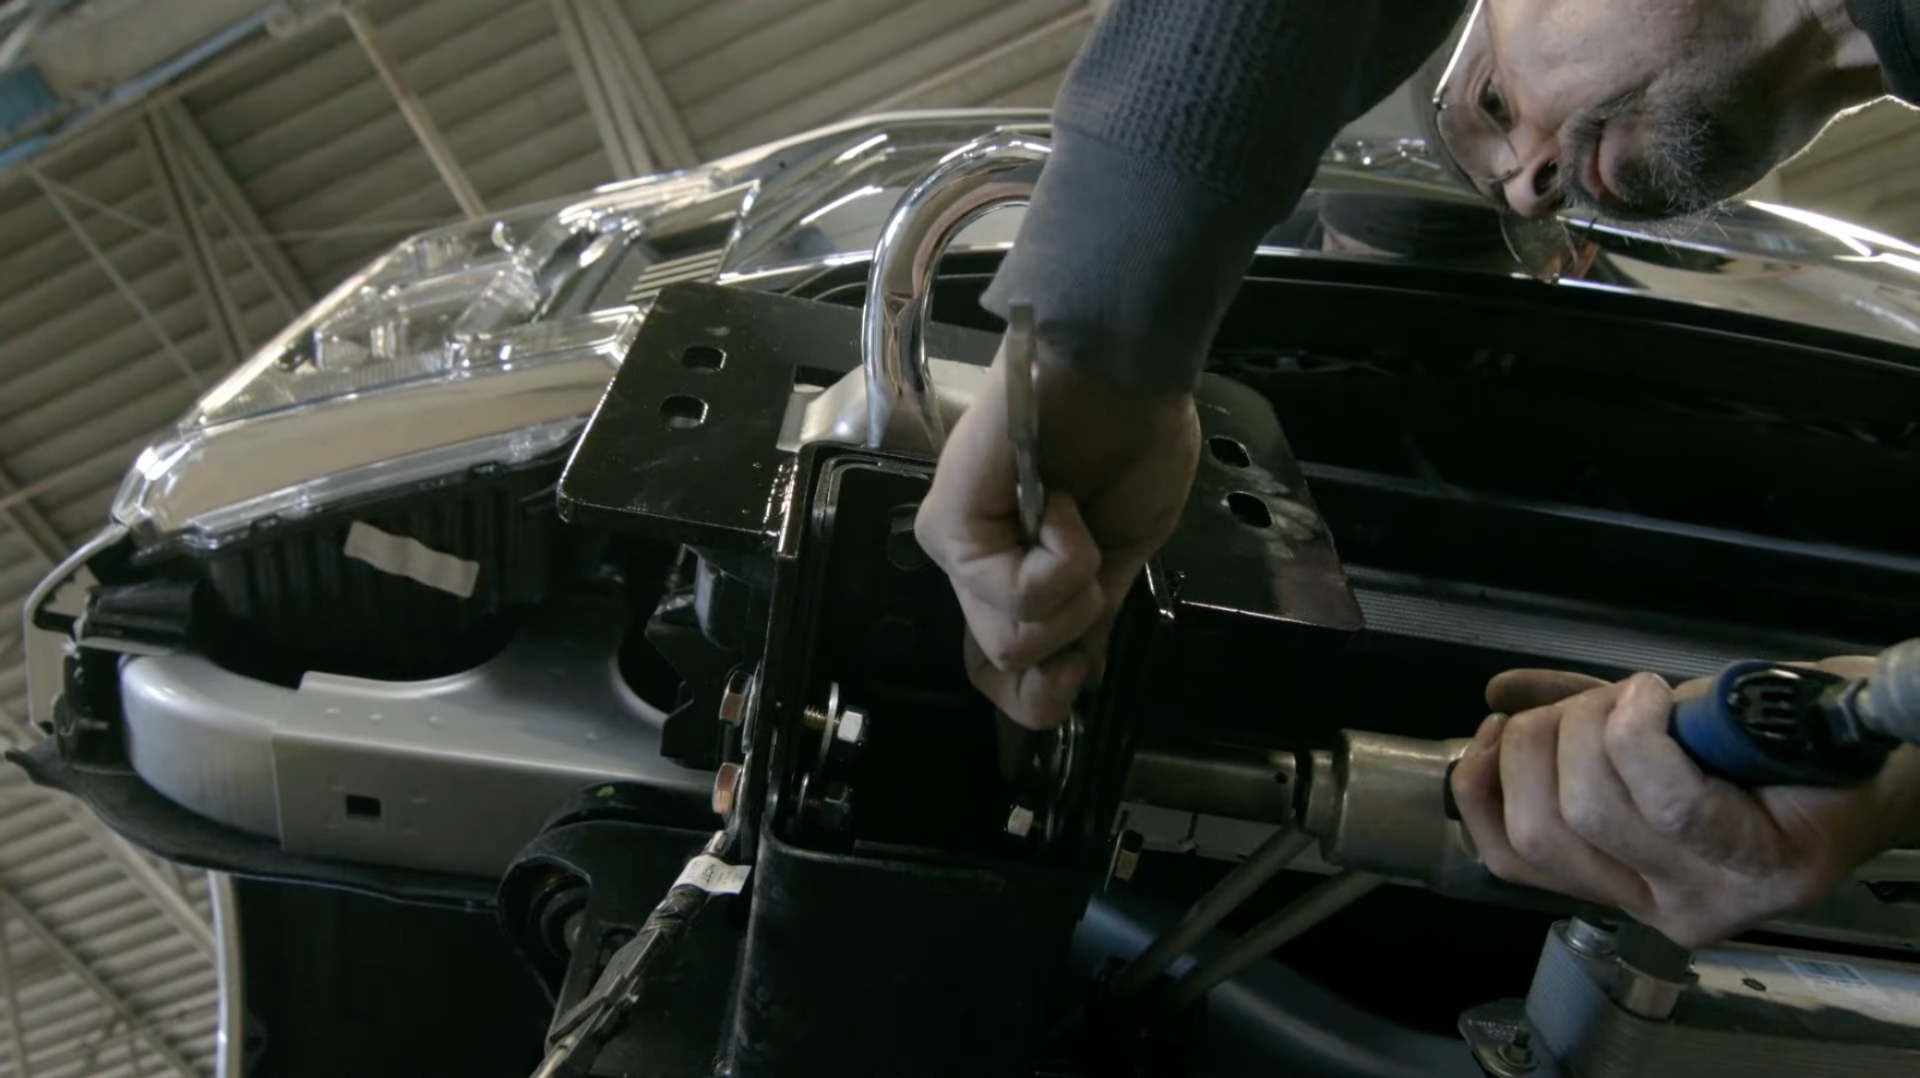
-
Make sure all Bumper Bracket bolts are Securely tightened
Now that your bumper bracket is installed, torque the nuts and bolts down tightly to ensure they are tight but are not over-tightened to prevent stripping. Go from side to side, adjacently and tighten all 16 nuts and bolts surrounding the mounting brackets. This will ensure your bumper performs for the long run and is installed sturdy and secure.
-
Use a lift or floor jack and stage the bumper for installation
Start by removing the protective wrapping from your bumper and then using a hydraulic lift, a floor jack or at least 3 people to stage it in front of the truck. Move the Ranch Hand bumper into position very slowly and carefully. Be careful to use proper safety equipment and practice safe handling practices to avoid injury or damage.
Lift or lower the bumper slowly to align the bolt holes in the bumper with the holes in the mounting brackets. -
Align the bolt holes carefully and insert the bolts
Next, using the bolts and washers provided in the hardware kit and press the bolts through the bumper and bracket holes and install the 4 bolts into the holes on the driver and passenger sides. Use an impact wrench or a socket wrench to tighten down each side using a criss-cross style pattern. Make sure the bumper is level and sitting parallel with the ground before fully tightening the bolts down.
Once the bumper is level, tighten the bolts down very snugly with an impact wrench or breaker bar to ensure the bumper is installed securely. -
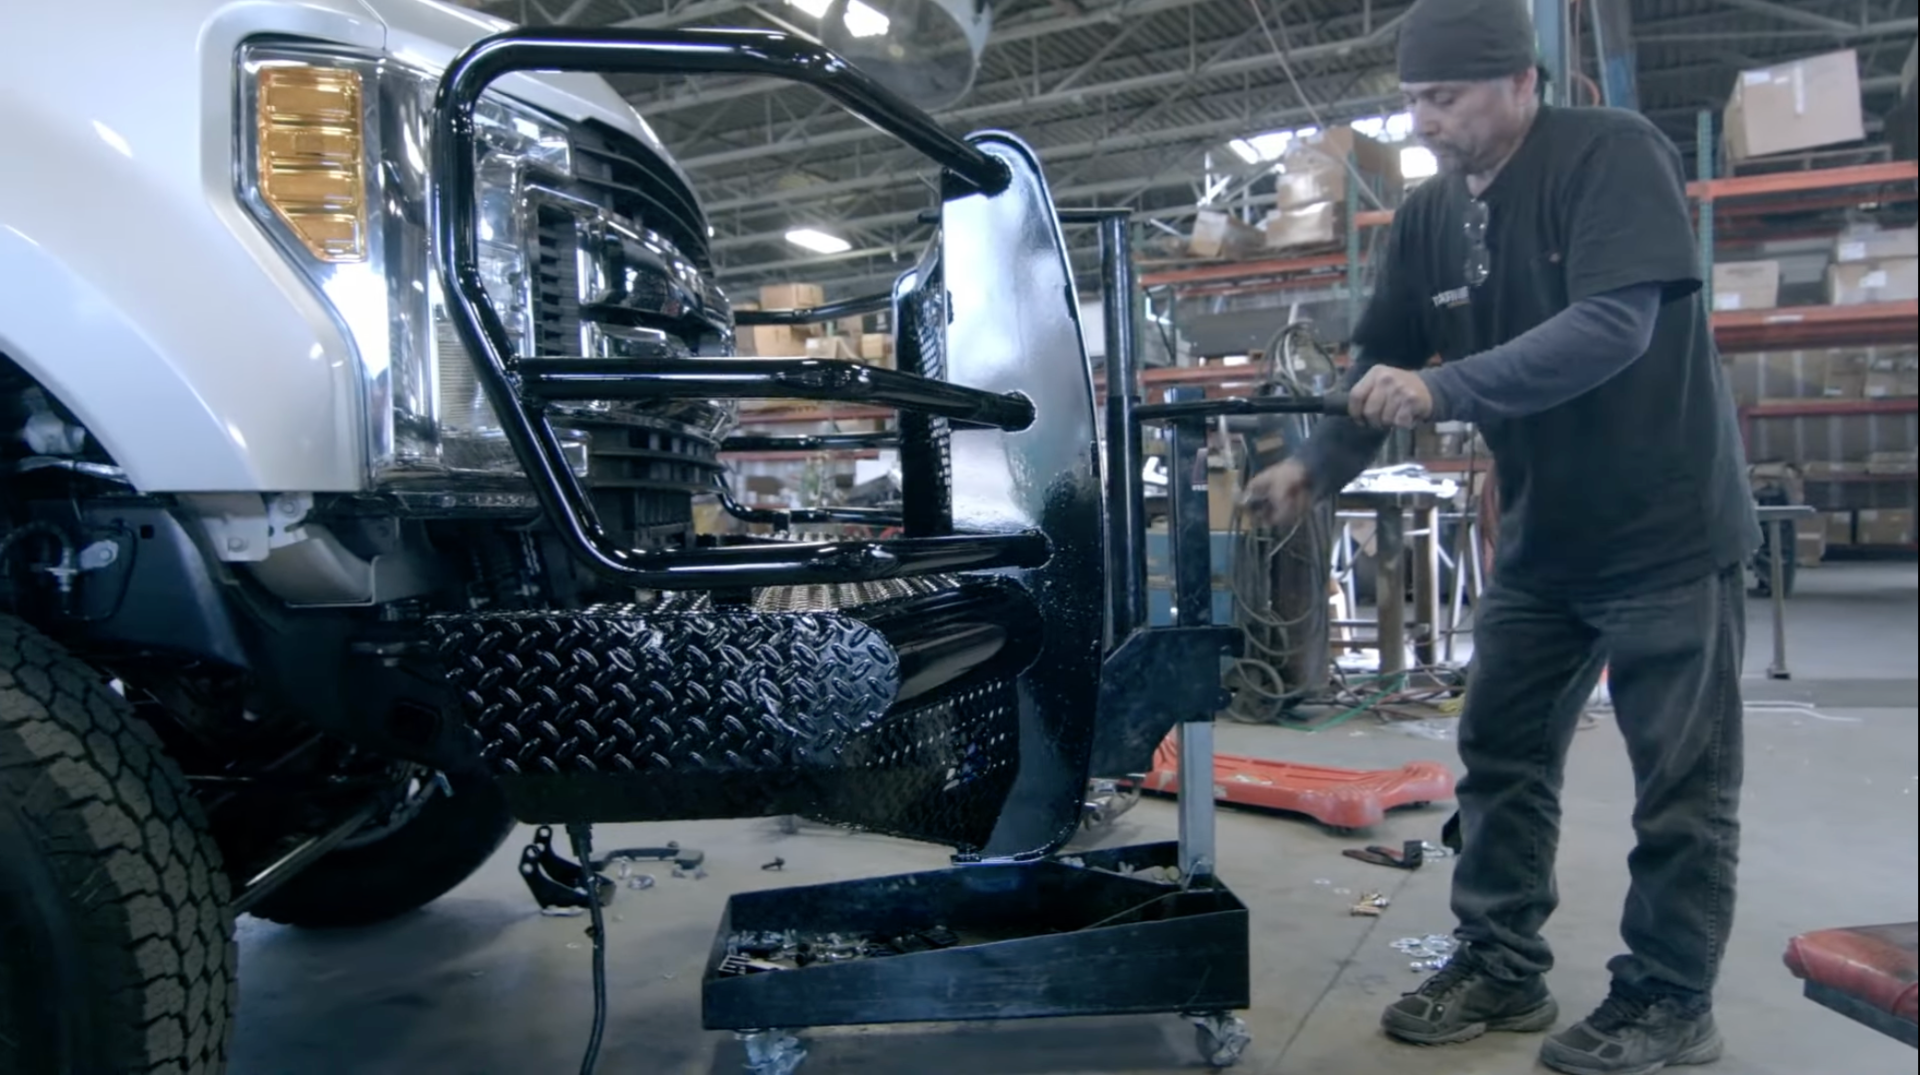
Once all the bolts are fully tightened, remove the hydraulic lift or floor jack
Congratulations! Your bumper is installed. Next, you will neeed to install the factory lights, sensors and cameras. -
Remove the factory lights from your OEM bumper
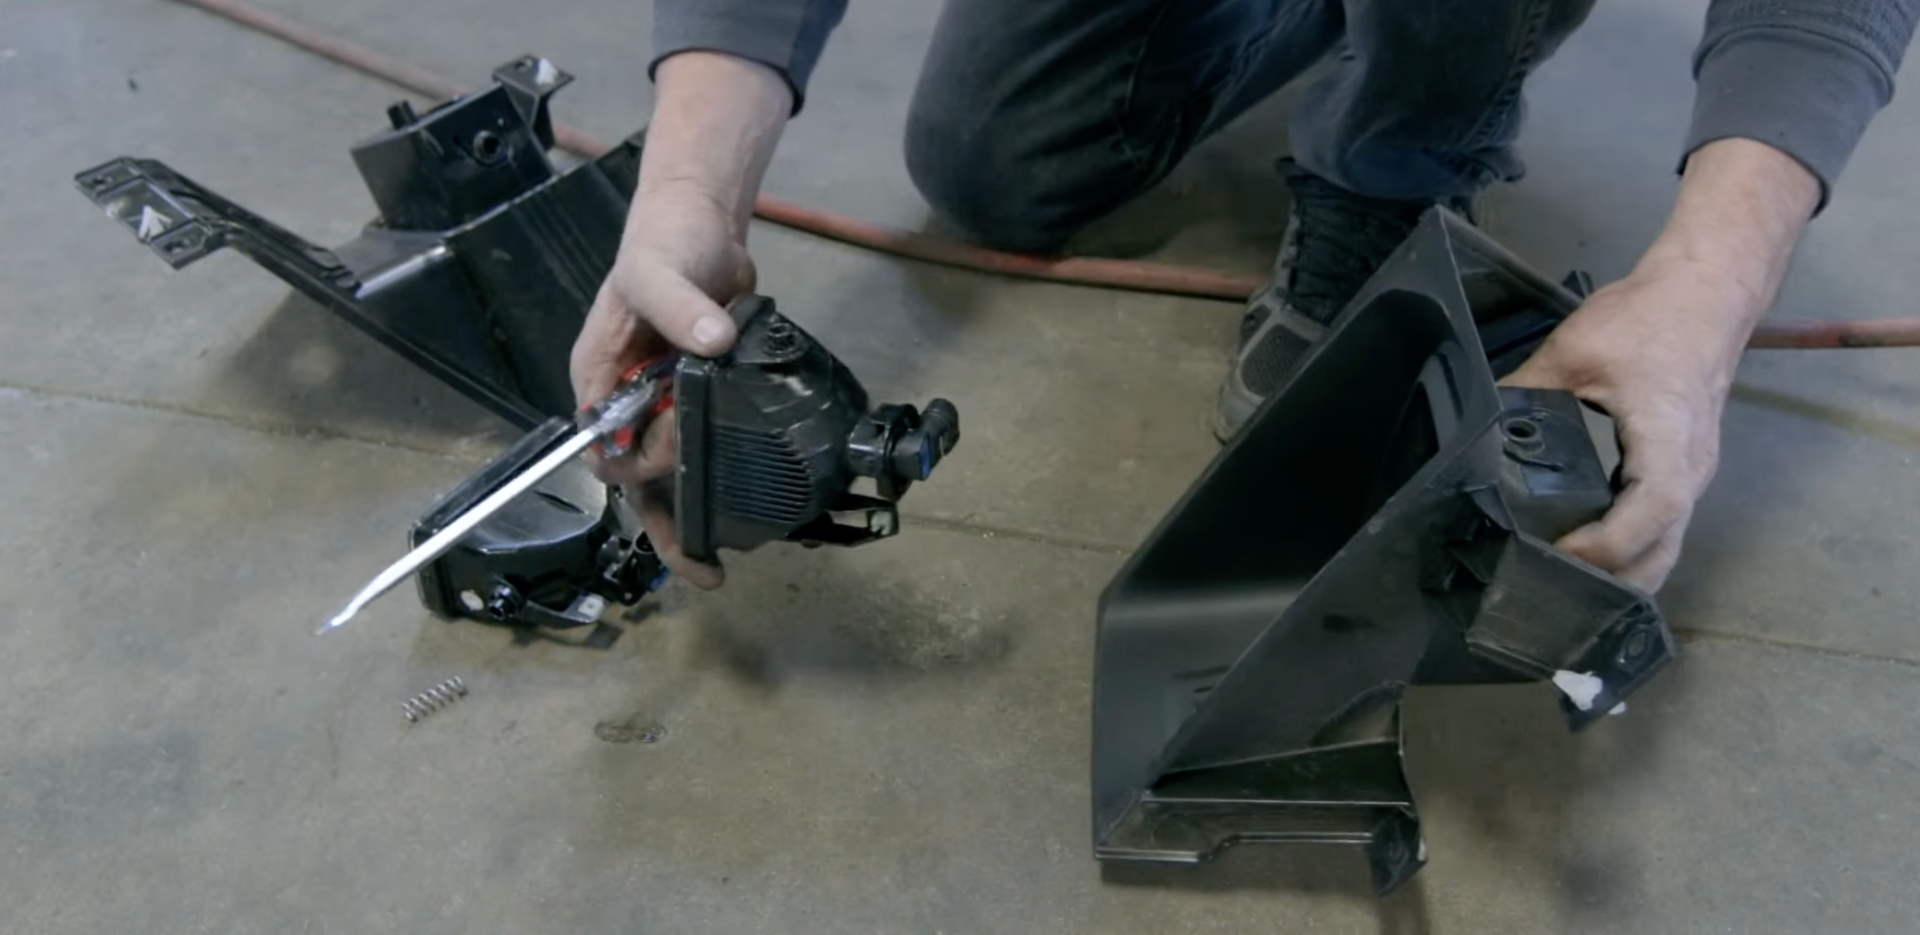
Grab a wrench or socket set and remove the lights from your original truck bumper. Remove the bolts and carefully pull the electrical plug apart by pushing the release tab. Make sure to retain all the factory hardware as you will need it in the next step.
Once the light is removed from the harness and bumper, you can remove the light from the factory light housing. Use your tool set and a screwdriver to pry apart the factory light housing to remove the light from the factory bumper. Repeat for the second light.
-
Place the lights in the provided Ranch Hand light housing

Now place the lights in the brackets provided and replace the hardware that was removed from the factory bumper. This may include nuts, bolts and springs. Tighten down the factory hardware while leaving it loose enough to adjust the lights once they are installed.
-
Install the light assembly to the provided L-bracket

Take your light assembly and attach it to the provided L-bracket. Bolt it down using the two provided nuts, bolts and washers. Repeat for lights on the other side.
-
Install your fog lights into the Ranch Hand bumper
Next, carefully place the light assembly into the light hole in the bumper. Be careful as the space will be tight and it may require some careful maneuvering to get the light into place. Once in place, take the provided nut, bolt and washer and bolt the L-bracket to the mounting bracket using a box head wrench and a socket wrench. Tighten the bolts down tightly. -
Remove the wiring harness from the factory bumper
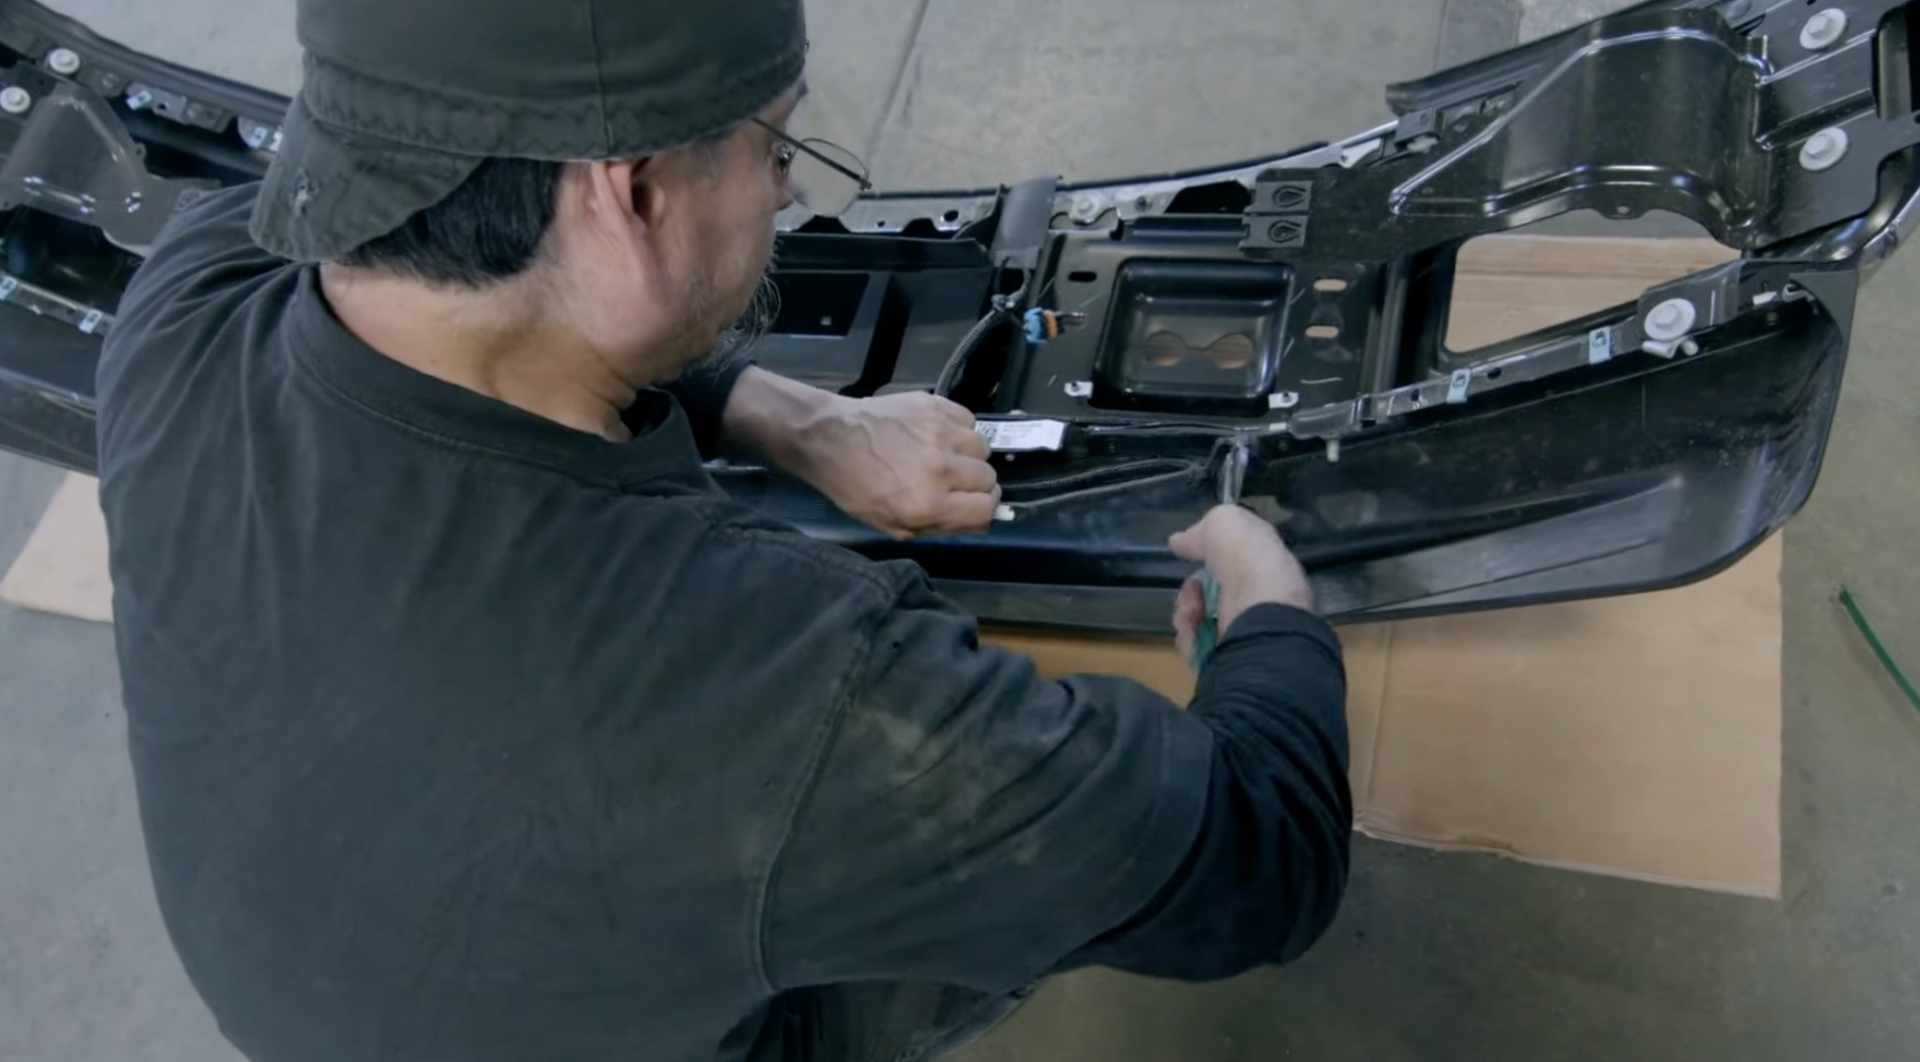
Carefully remove the wiring harness from the factory bumper using snips. Cut through the zip ties or plastic retainers very carefully. Do not cut into the wires or pince them as this may cause problems with your lights or electrical system later.
-
Plug the wiring harness into the truck and run the wire

-
Make sure the vehicle is turned off and the battery is removed. Plug the wiring harness into the truck and run the wiring harness through the bumper towards both of the lights. Ensure the wiring harness is not tensioned or pulled tight to ensure it will not be stretched or broken. Plug the harness into each light. Use plastic zip ties to secure the wiring harness snugly to the truck bumper.
7: Repeat the process for parking sensors, cameras or other OEM wiring
Repeat the same process to install other factory wiring that may exist on your truck, such as parking sensors, front-facing cameras, adaptive cruise control or even aftermarket lights, sirens or gear.
8: Test the lights, sensors and OEM installed wiring to ensure functionality
Reconnect the truck battery and perform a test to make sure all factory lights and features are working correctly. Reattach the front license plate and ensure all clips, plugs and hardware is snug and tight.
Now you're done! Enjoy having the robust protection and sharp style of a Ranch Hand bumper on your truck.
If you own a truck, you know how important it is to protect your rig, especially if you work on job sites or frequently travel or venture off-road.
A heavy-duty steel bumper will look sharp and protect your truck as well as family, friends or colleagues if you have them in and out of your truck often.
Fortunately, replacing your bumper with a Ranch Hand powder-coated steel bumper can protect and make your truck much safer in the event of a mishap, while also improving the overall utility and look of your rig, giving it a bold, rugged and sporty style. Our steel bumpers are designed to perform on the job site and protect from road debris, helping you to get work done while also helping to protect passengers inside your vehicle.
At Ranch Hand, we know how important it is to prepare your truck for any type of task or job. In this step-by-step installation guide, we'll guide you through the process of installing a Ranch Hand steel bumper on your truck. Before we get started, there are a few things you should know.
First, the process of installing a Ranch Hand bumper can vary depending on the make and model of your truck. The installation process requires tools, including a standard and metric socket wrench set and a torque wrench. The first step in installing a Ranch Hand bumper on your truck is to gather all the necessary tools and prepare your truck for the installation. The bumper will also come with a specific set of instructions for your specific make, model and year truck. Be sure to keep the installation instructions handy as it will outline exactly which socket sizes you will need and help you understand what steps need to be taken to remove your factory truck bumper on your particular model.You will need a socket wrench — that can be air-powered, battery-powered or standard wrench. An impact wrench will also be beneficial to have to break loose stubborn bolts. Likewise, a standard box-end wrench or ratchet wrench is necessary to have handy. A floor jack and a set of jack stands may also be needed, as well as a floor creeper for ease of installation if you need to get under the truck. Before you install your Ranch Hand bumper, you will first need to prep your truck. To get better access to the underside of your rig, it may help to raise the truck using a lift or floor jacks and jack stands. Next up, you will need to install the mounting brackets before mounting your new bumper. Follow along carefully to ensure your bumper fits and performs as designed. Note: the installation process may vary depending on truck make and model. It is important to reference the installation instructions provided. Now that you've got your factory bumper removed and the brackets installed, your truck is prepped and it's game time. Now for the exciting part of installing your Ranch Hand front bumper. Note: the installation process may vary depending on truck make and model. It is important to reference the installation instructions provided. Ranch Hand manufactures durable, powder-coated products that are suitable for hard-working trucks, and our bumpers are designed and capable of heavy-duty work on ranch and construction sites day in and day out. Our bumpers are designed with unique features that stand apart from other bumpers and feature robust build quality and construction that is unmatched. From our Legend™ series, the Midnight™ series, the Summit™ series and the Sport™ series, we've got a bumper that'll prove itself no matter what the task is at hand. You can take pride in knowing your Ranch Hand bumper is designed, cut, fabricated, welded and finished right here in the USA. For a quality bumper that often times will outlast the truck itself, choose Ranch Hand. Q: How much does it cost to have a bumper installed professionally? Installation costs vary depending on the specific truck application, the specific shop of choice and the hourly shop rate. On average, it can take anywhere from 3-4 hours and an average shop rate may be around $120 per hour. Q: How long does it take to a Ranch Hand bumper? Installation time can vary depending on the specific truck application and the level of experience of the installer. However, on average, it can take anywhere from 2 to 4 hours. Q: What makes Ranch Hand front bumpers different from other brands? Ranch Hand front bumpers are renowned for their durability, functionality, and style. They are constructed using high-quality materials and are designed to provide maximum protection for your vehicle, especially in heavy-duty conditions or off-road conditions. Q: Are Ranch Hand front bumpers compatible with all truck makes and models? Ranch Hand offers a variety of front bumpers designed to fit a range of truck makes and models. It's essential to check compatibility with your specific vehicle before purchasing. Q: How much does a typical Ranch Hand front bumper weigh? The weight of a Ranch Hand front bumper can vary depending on the model and features, but heavy-duty models such as the Sport™ can weigh several hundred pounds and are only meant for 3/4+ ton trucks. This weight is an important factor to consider for the installation process. Q: Is professional installation recommended for Ranch Hand front bumpers? Due to the weight and complexity of installing a heavy-duty bumper, it's often recommended to have it professionally installed. However, if you have the right tools and experience, installation is feasible as a DIY project. Q: Do Ranch Hand front bumpers come with installation hardware? Yes, Ranch Hand bumpers generally come with all the necessary hardware and brackets required for installation. However, it's advisable to read through the installation manual to confirm. Q: How do I ensure that my Ranch Hand front bumper is aligned correctly during installation? Proper alignment can usually be achieved by loosely fitting all bolts and making adjustments before tightening them fully. Always refer to the installation manual for precise instructions. Q: What kind of maintenance is required for a Ranch Hand front bumper after installation? Occasionally check for any signs of rust, loose bolts, or other wear and tear. Keep the bumper clean and, if possible, apply a protective coating to enhance its longevity.
You may need some extra hands to help as well, so grab a few friends before you begin.
Step 1: Gather the Required Tools & Materials
But first, you will need to choose which bumper is best for your rig. If you're not sure which bumper is best, see our guide for choosing a RANCH HAND BUMPER to see which bumper fits your needs. Once you have the bumper, you will need to unwrap and stage the bumper and locate the provided hardware bag which will include the nuts, bolts, washers and brackets that are required to get your bumper installed on your specific truck model.
A torque wrench may also be beneficial for ensuring the bolts holding your bumper in place are torqued down to the proper spec. It is also a good idea to have a friend or two available to help you during the installation process, especially when lifting the bumper into place. This can be difficult because of the bumper size and weight.Tools and materials needed:
Step 2: Remove the Existing Factory Bumper
Step 3: Install the Ranch Hand Bumper Mounting Brackets
Step 4: Stage Your Ranch Hand Bumper & Prepare to Install
Step 5: Install the factory lights, sensors and cameras from your OEM bumper
Why are Ranch Hand Bumpers Known as the Toughest Bumpers Around?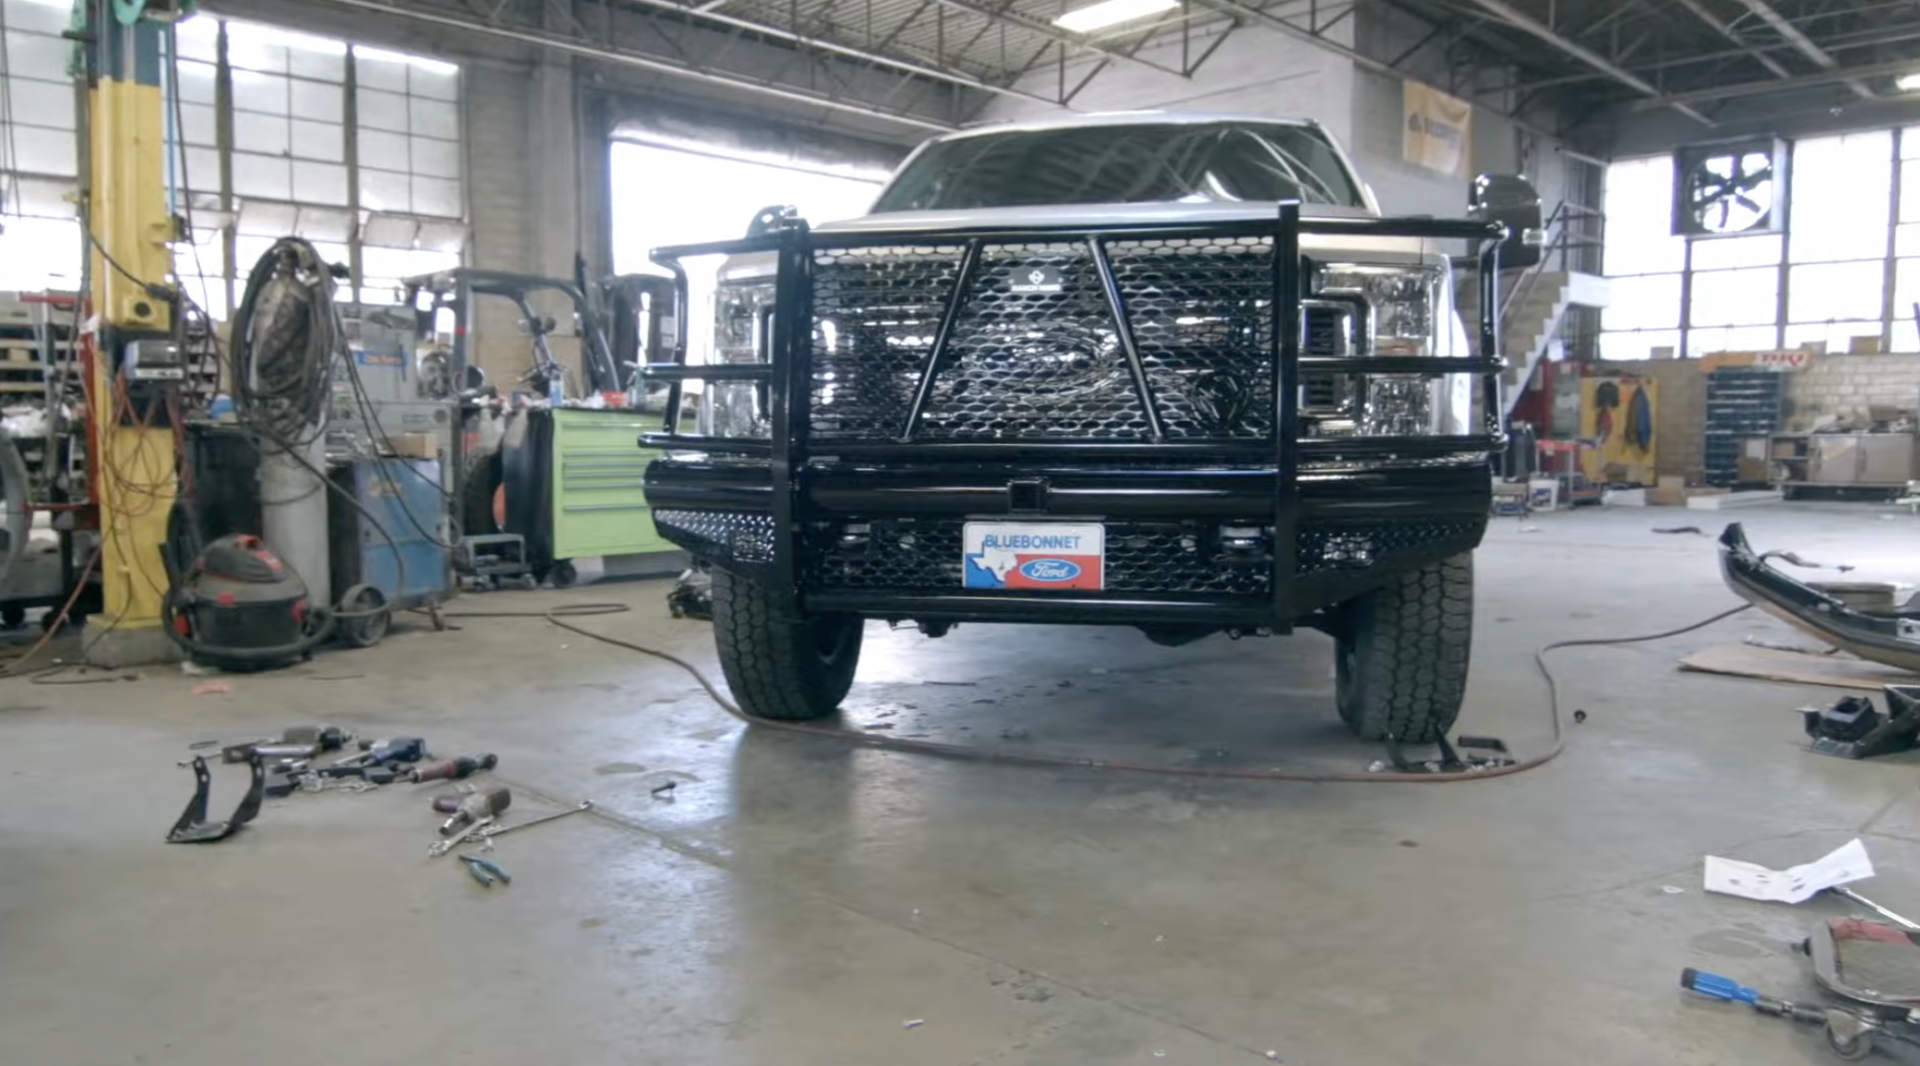
Ranch Hand bumpers are sturdy and strong and provide protection that is proven to be reliable for many miles and years. Designed, Fabricated & Finished in the USA
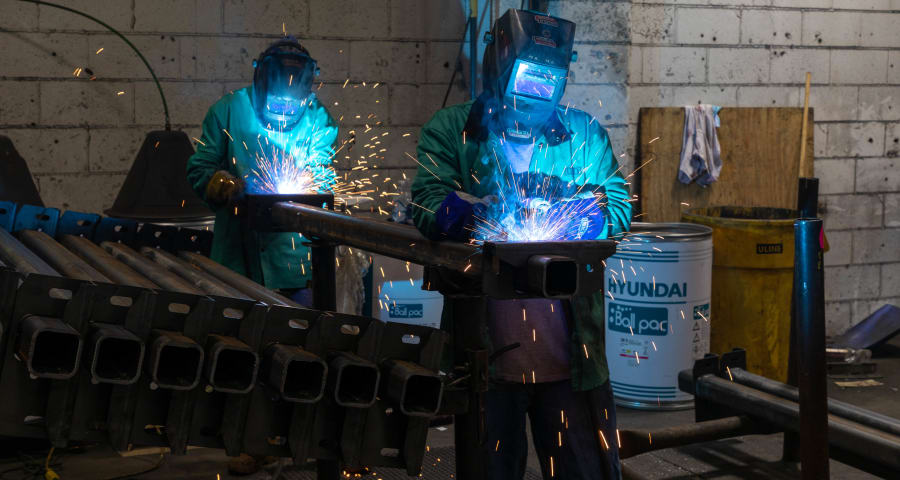
Ranch Hand bumpers are made with careful eyes and working hands and are fabricated and forged from the highest quality steel and materials around. They're built to last, made to take a hit and will last many years and many miles, giving your pickup truck a distinguished look that signals hard work and dependability.
FAQ — Frequently Asked Questions