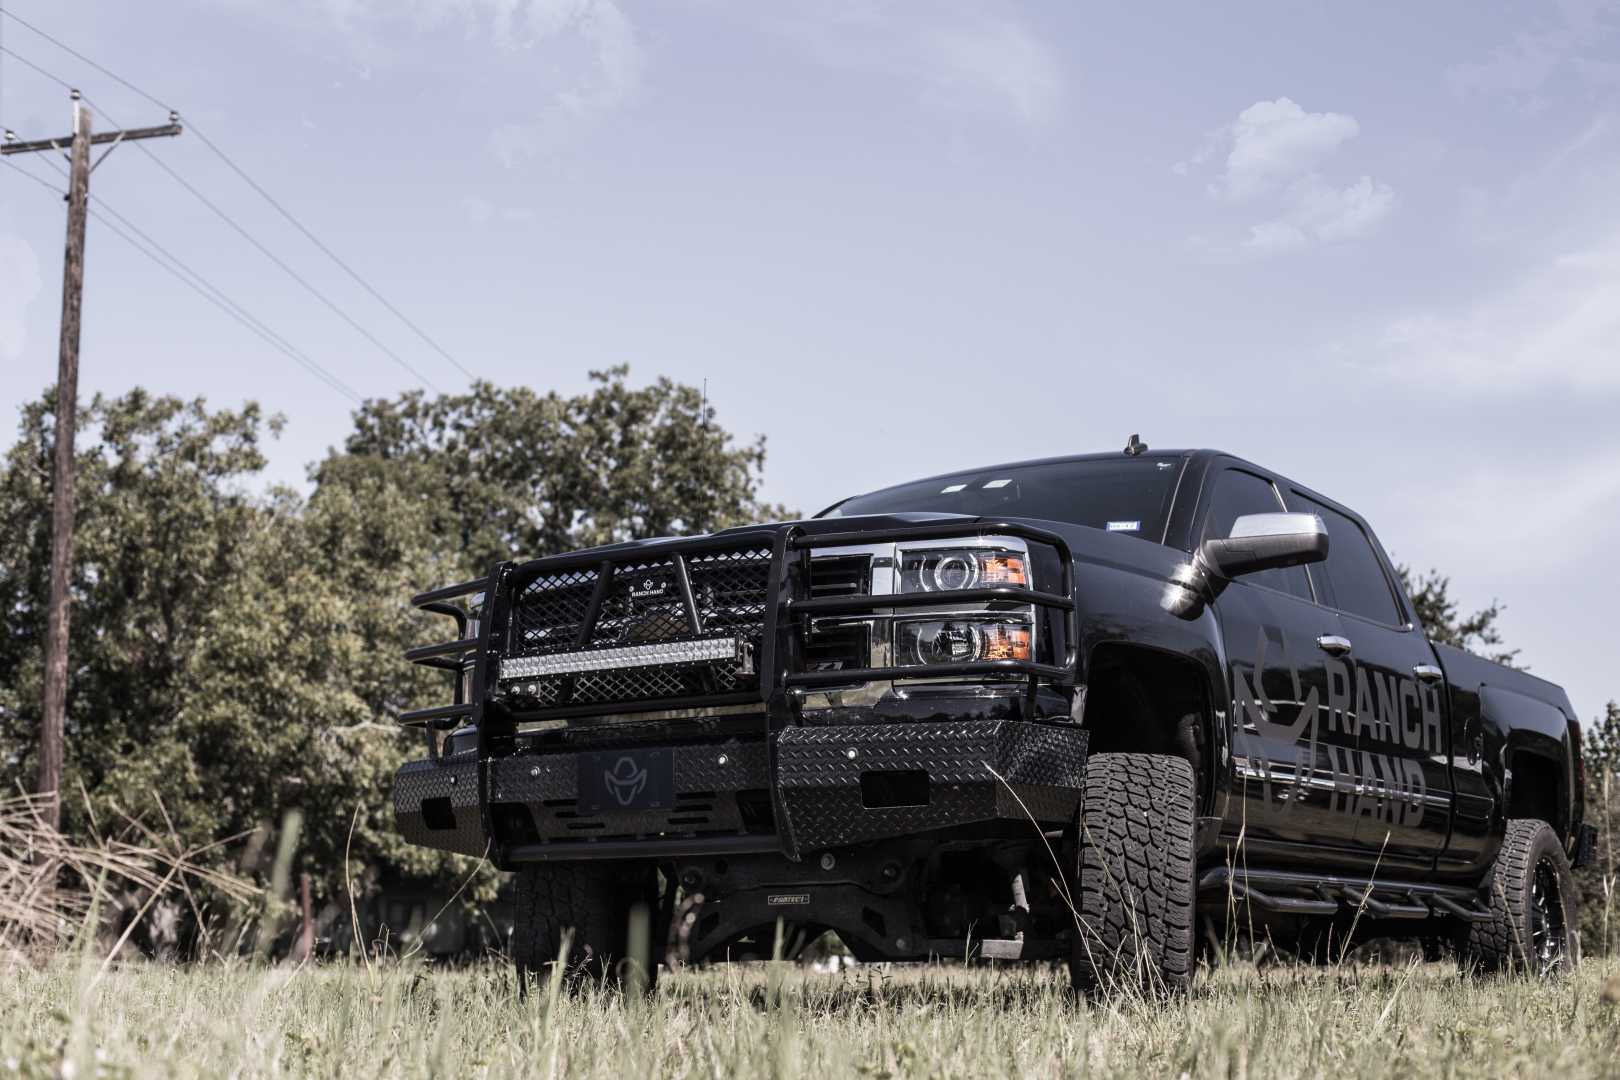
Whether your factory bumper has been damaged in a collision, took the brunt of an unfortunate deer strike, or simply isn't built for the demands of your truck, replacing it is one of the most worthwhile upgrades you can make. A quality replacement bumper restores your Silverado's appearance while helping protect some of its most vulnerable front-end components. For many truck owners, it's also an opportunity to upgrade to a heavy-duty steel bumper that's better suited for work, towing, or rural driving.
The good news is that a Chevrolet Silverado 1500 replacement bumper installation is a project that many experienced DIYers can tackle in a home garage. While every bumper manufacturer has its own hardware and mounting system, the overall installation process follows the same general steps. Success comes down to preparation, taking your time, and paying close attention to fitment before tightening everything into place.
In this guide, we'll walk through everything you need to know before picking up a wrench, from verifying vehicle compatibility and gathering the right tools to removing the factory bumper, installing a replacement, reconnecting electronics, and performing the final inspections that ensure your new bumper is ready for the road.
- What to Know Before You Start
- Tools & Materials Needed
- Removing the Factory Bumper
- Preparing Your Truck for a New Bumper
- Installing the Replacement Bumper
- Reconnecting Sensors & Electronics
- Final Checks & Alignments
- Aftermarket Bumper Installation Tips
- Key Takeaways
- FAQ About Chevy Silverado 1500 Replacement Bumpers
What to Know Before your Start
Installing a replacement bumper is more involved than simply removing a few bolts and hanging a new one on the front of your truck. Today's Chevrolet Silverado 1500 models integrate a variety of electrical components, safety systems, and trim-specific features into the front bumper, making preparation one of the most important parts of the entire project.
The first step is confirming that your replacement bumper is designed specifically for your Silverado. While trucks from nearby model years may look nearly identical, differences in frame mounting locations, grille design, tow hook placement, parking sensors, fog lights, and camera systems can all affect compatibility. Choosing the correct bumper from the start eliminates unnecessary modifications and helps ensure everything lines up the way it should.
If your Silverado is equipped with factory parking sensors, adaptive cruise control, a front-facing camera, or other driver assistance technology, verify that your new bumper is designed to accommodate those systems. Many premium aftermarket bumpers retain these factory features, but only when they're installed correctly and paired with the appropriate brackets or sensor provisions.
It's also worth considering how you'll use your truck after the installation. If you frequently drive rural highways, visit job sites, or spend weekends exploring trails, a heavy-duty steel bumper can offer significantly more protection than the factory unit. Many replacement bumpers also provide mounting locations for auxiliary lighting, recovery points, or a winch, allowing you to tailor your Silverado to your specific needs.
Before turning the first wrench, read through the manufacturer's installation instructions from beginning to end. Understanding the sequence of the installation ahead of time will help you anticipate each step instead of discovering surprises halfway through the project. Lay out the supplied hardware, identify the brackets, and compare everything to the parts list. Spending ten minutes organizing your workspace now can save an hour of frustration later.
Finally, don't underestimate the size and weight of a replacement bumper. Heavy-duty steel bumpers can weigh considerably more than the factory bumper and are awkward to maneuver by yourself. Having another person available during removal and installation makes the process safer, easier, and far less stressful.
Verify Vehicle Compatibility
Before beginning your Chevy Silverado 1500 replacement bumper installation, verify that the replacement bumper is designed specifically for your truck.
Factors that can affect compatibility include:
- Model year
- Trim level
- Engine package
- Tow package
- Parking sensor configuration
- Adaptive cruise control equipment
- Factory fog lights
- Camera systems
Always confirm fitment before ordering parts or beginning disassembly.

Safety Considerations
Although removing the factory bumper is manageable, installing a heavy-duty steel replacement is often a two-person job. These bumpers are substantially heavier and can be awkward to lift and align without assistance.
Before getting started:
- Park the truck on a flat, stable surface.
- Engage the parking brake.
- Wear safety glasses and work gloves.
- Disconnect the negative battery terminal.
- Have a helper available to lift and position the bumper safely.
Warranty & Fitment Considerations
Take a few minutes to review the manufacturer's installation instructions before beginning. Following the recommended procedures helps ensure proper fitment and can help prevent issues that may affect product performance or warranty coverage.
If your Silverado is equipped with features such as parking sensors, a front camera, or other driver assistance technologies, confirm that your replacement bumper is designed to accommodate those systems before installation.
Tools & Materials Needed
One of the easiest ways to keep a project moving smoothly is to have every tool within reach before you begin. Few things slow down an installation more than stopping halfway through to search for a socket or make another trip to the hardware store.
For most Silverado bumper installations, you'll need a standard assortment of hand tools including sockets, ratchets, extensions, combination wrenches, and screwdrivers. A trim removal tool is helpful for removing plastic clips and panels without damaging them, while a torque wrench is essential for tightening the mounting hardware to the manufacturer's specifications. You'll also want safety glasses, work gloves, and moving blankets or cardboard to protect painted surfaces while the bumper is off the truck.
Depending on your replacement bumper, you may also need to transfer factory components such as parking sensors, fog lights, tow hooks, license plate brackets, or wiring harnesses. Keeping small hardware organized in labeled containers or magnetic trays helps ensure nothing gets misplaced during the process.
Although not absolutely required, a floor jack or adjustable support stand can make positioning the bumper much easier. Heavy-duty bumpers are built to withstand years of abuse, but that strength comes with additional weight. Supporting the bumper while starting the mounting bolts allows you to focus on alignment instead of trying to hold everything in place.
Perhaps the most valuable tool isn't found in your toolbox at all. A second set of hands can make a significant difference when lifting, aligning, and securing the bumper. Trying to rush this part of the installation by yourself often results in scratched paint or uneven fitment that takes additional time to correct.
Required Tools
Most installations require:
- Ratchet and socket set
- Combination wrenches
- Torque wrench
- Trim removal tools
- Screwdrivers
- Pliers
- Work gloves
- Safety glasses
Helpful Optional Tools
While not required, these tools can make the job easier:
- Floor jack
- Jack stands
- Rolling work table
- Magnetic parts tray
- Shop light
- Cordless impact driver
Components and Hardware
Depending on the bumper model, your kit may include:
- Mounting brackets
- Frame mounting hardware
- Sensor mounting components
- Light mounting provisions
- License plate bracket
- Installation instructions
Verify all hardware is present before beginning assembly.

Removing the Factory Bumper
With the truck parked on a level surface and the negative battery cable disconnected, it's time to remove the factory bumper. This portion of the installation generally takes longer than people expect, not because it's especially difficult, but because modern bumpers incorporate more components than ever before.
Start by removing any lower splash shields or trim pieces that limit access to the bumper mounts. As you expose the mounting hardware, you'll also encounter wiring for factory features such as fog lights, parking sensors, cameras, or other electrical accessories depending on your Silverado's trim level.
Take your time disconnecting each electrical connector. Most use locking tabs that should be released before pulling the connector apart. Tugging on the wiring instead of the connector body can damage the harness and create problems that are much more difficult to fix later.
Once the electrical components have been disconnected, locate the primary frame mounting bolts. Before removing them completely, support the bumper from underneath or have a helper hold it in position. Factory bumpers can shift unexpectedly as the last fasteners are removed, increasing the risk of damage to the truck or injury to yourself.
As each bolt comes out, keep the hardware organized if any of it will be reused. Setting bolts aside in the order they were removed makes reassembly much simpler, particularly if different lengths or washers are involved.
With the final fasteners removed, carefully lift the bumper away from the truck and place it on a padded work surface. This is an excellent opportunity to inspect the front of the frame, looking for signs of damage, corrosion, or bent mounting surfaces that could affect the fitment of your replacement bumper.
Disconnect Electrical Components
Before removing the bumper, disconnect any electrical components attached to it. Depending on your Silverado's trim level and factory options, this may include:
- Fog lights
- Parking sensors
- Front-facing camera
- Adaptive cruise control sensors
- Auxiliary lighting or other factory wiring
Release each connector by pressing the locking tab before separating it. Pulling on the wiring instead of the connector can damage the harness or create electrical issues down the road.
Remove the Factory Mounting Hardware
Once the electrical connections have been unplugged, locate the bolts securing the bumper to the frame rails. As you begin removing the hardware, it's important to keep the bumper properly supported so it doesn't shift unexpectedly.
A few tips can make this step much easier:
- Support the bumper before removing the final bolts.
- Keep all hardware organized if any pieces will be reused.
- Check behind trim panels or splash shields for hidden fasteners.
Many installers prefer to leave one or two bolts loosely threaded until they're ready to lift the bumper away from the truck. Doing so helps keep the bumper stable while the remaining hardware is removed.
Remove the Factory Bumper
With all mounting hardware removed, carefully pull the bumper away from the front of the truck. Factory bumpers are lighter than most heavy-duty aftermarket options, but they're still bulky enough to be awkward to handle.
If you're working without a helper, use a floor jack or support stand to help carry the weight of the bumper and reduce the risk of dropping it during removal.
Avoid Common Removal Mistakes
Removing the factory bumper is usually straightforward, but a little extra care now can save time and frustration later. As you work, avoid:
- Pulling or stretching wiring harnesses
- Damaging sensor connectors or mounting clips
- Bending factory mounting brackets
- Mixing up or misplacing hardware
- Scratching painted surfaces around the grille or fenders
Taking a slow, methodical approach during disassembly makes the installation process much smoother and helps ensure everything goes back together the way it should.

Preparing the Truck for the New Bumper
Before installing the new bumper, spend a few minutes preparing both the truck and the replacement bumper itself. This often-overlooked step plays a major role in achieving a clean, factory-quality installation.
Begin by cleaning the frame rails and mounting surfaces. Dirt, rust, and road debris can prevent brackets from seating properly, making it more difficult to achieve even panel gaps. A wire brush and shop towel are usually all that's needed to clean the mounting locations.
Next, transfer any factory components required by your new bumper. Depending on the design, this may include parking sensors, fog lights, tow hooks, wiring harnesses, or other brackets. Handle parking sensors carefully, as they're precision components that can be damaged by impact or improper installation.
As you transfer each component, inspect it for wear. Broken clips, worn wiring insulation, or damaged connectors are much easier to replace while everything is disassembled than after the bumper is mounted back on the truck.
Now is also a good time to loosely assemble any brackets or accessories that the manufacturer recommends installing before mounting the bumper. Completing this work on a bench is almost always easier than trying to reach behind the bumper once it's installed.
Finally, compare the supplied hardware with the installation instructions one last time. Verifying that everything is present before lifting the bumper onto the truck helps avoid unnecessary interruptions.
Inspect the Mounting Points
With the factory bumper removed, take a few minutes to inspect the frame before installing the replacement. This is the best opportunity to spot any issues that could affect fitment or alignment.
Pay close attention to:
- Frame horns and mounting brackets
- Rust or corrosion
- Damaged or stripped threads
- Dirt, mud, or other debris on the mounting surfaces
Cleaning the mounting areas now helps the new bumper sit flush against the frame and makes final alignment much easier.
Transfer Factory Components
Many replacement bumpers are engineered to reuse factory equipment, allowing you to retain the features your Silverado came with from the factory.
Depending on the bumper you're installing, you may need to transfer components such as:
- Parking sensors
- Tow hooks
- Fog lights
- Front-facing camera
- License plate bracket
Handle sensors and wiring carefully during this step, and follow the manufacturer's instructions to ensure they're installed in the correct locations for proper operation.
Pre-Assemble the New Bumper
Before lifting the bumper onto the truck, complete any assembly steps recommended by the manufacturer. Taking care of these tasks while the bumper is on a workbench is typically faster and gives you better access to the mounting locations.
Common pre-assembly steps include:
- Installing frame mounting brackets
- Securing sensor bezels
- Attaching light mounting brackets
- Installing auxiliary lights or other accessories
Taking the time to fully prepare the bumper before installation helps the rest of the project go more smoothly and minimizes the amount of work you'll need to do once it's mounted on the truck.
Installing the Replacement Bumper
This is the point where preparation begins to pay off.
With a helper supporting the opposite side, carefully raise the replacement bumper into position and align the mounting brackets with the frame rails. Start each mounting bolt by hand before tightening any of them. Keeping the hardware loose allows the bumper to move slightly while you dial in the final fitment.
Once the bumper is hanging securely, begin checking its position from multiple angles. Stand back several feet and compare the gaps beneath the grille and around the fenders. Look along the body lines to ensure both sides are even and that the bumper sits level across the front of the truck.
Small adjustments can make a dramatic difference in the finished appearance. Shifting the bumper just a fraction of an inch may improve hood clearance, center the body lines, or create more consistent gaps around the grille. Taking your time during this stage often separates a professional-looking installation from one that immediately looks aftermarket.
After you're satisfied with the alignment, gradually tighten the mounting hardware according to the manufacturer's recommended torque specifications. Tighten the hardware evenly from side to side rather than fully tightening one side first. This helps maintain proper alignment as the bumper is drawn securely against the frame.
If your replacement bumper includes optional accessories such as light mounts, grille inserts, or winch components, complete those installations according to the manufacturer's instructions before moving on to the electrical connections.
Position the Replacement Bumper
With the help of another person, carefully lift the replacement bumper into place and align it with the frame mounting points. Heavy-duty steel bumpers can be difficult to maneuver, so taking your time during this step will make the rest of the installation much easier.
If you're working without a helper, a floor jack or adjustable support stand can help hold the bumper in position while you start the mounting hardware.
Check the Fitment
Before tightening any bolts, inspect the bumper from several angles to make sure it's sitting correctly. Small adjustments now can make a noticeable difference in the finished appearance.
Look for:
- Even gaps between the bumper and body panels
- Proper clearance around the headlights
- Adequate hood clearance throughout its full range of motion
- A level position across the front of the truck
Leave the mounting hardware slightly loose until you're satisfied with the alignment.
Secure the Mounting Hardware
Once the bumper is positioned correctly, begin tightening the hardware while continuing to monitor the fitment. Tightening everything gradually helps keep the bumper aligned as it's drawn against the frame.
For the best results:
- Start every fastener by hand.
- Tighten the hardware a little at a time.
- Alternate between mounting points rather than tightening one side completely.
- Check the alignment periodically as you work.
Using this approach helps prevent the bumper from shifting and reduces the need for readjustments later.
Tighten to Specification
After the final alignment has been confirmed, tighten all mounting hardware according to the manufacturer's recommended torque specifications.
Using the proper torque helps ensure the bumper is securely mounted without overstressing the hardware or damaging the mounting brackets and frame attachment points.

Reconnecting Electronics and Accessories
One of the biggest advantages of many modern replacement bumpers is their ability to retain factory electronics. When installed correctly, features such as parking sensors, fog lights, and cameras can continue operating much like they did with the factory bumper.
Reconnect each wiring harness carefully, making sure every connector clicks securely into place. Loose electrical connections can lead to intermittent operation that's difficult to diagnose later.
Pay close attention to wire routing as you reinstall the harnesses. Wires should be secured away from sharp edges, moving suspension components, and excessive heat. Factory clips should be reused whenever possible to prevent the wiring from sagging or rubbing during normal driving.
Once all of the electrical connections have been made, reconnect the battery and perform a functional check before reinstalling any remaining trim pieces. Verify that the fog lights illuminate properly, parking sensors activate as expected, and any cameras or other electronic systems function normally. Addressing issues now is much easier than after the truck has been fully reassembled.
Reconnect Lights and Electronics
With the bumper securely mounted, reconnect any factory electrical components that were removed during disassembly. Depending on your Silverado's equipment, this may include:
- Fog lights
- Parking sensors
- Front-facing camera
- Auxiliary lighting
- Other factory accessories
As each connector is reinstalled, make sure it clicks securely into place. A fully seated connection helps ensure reliable operation and reduces the chance of intermittent electrical issues.
Inspect the Wiring
Before wrapping up the installation, take a few minutes to inspect the wiring around the bumper. Proper routing is essential for protecting the harnesses from damage caused by vibration, heat, or moving components.
Check that the wiring:
- Is securely fastened using factory clips or retainers
- Is routed away from sharp edges
- Has adequate clearance from moving suspension or steering components
- Is kept away from excessive heat whenever possible
A quick inspection now can help prevent electrical problems and unnecessary repairs down the road.
Reinstall the License Plate Bracket
If your replacement bumper uses a front license plate bracket, reinstall it once the electrical components have been connected and tested. Before tightening the hardware, verify that the bracket doesn't interfere with parking sensors, lighting, airflow, or any other factory equipment integrated into the bumper.

Final Checks & Adjustments
With the bumper installed and the electronics functioning properly, resist the urge to call the project complete just yet. A thorough final inspection ensures your hard work pays off with years of dependable performance.
Walk around the truck several times, looking at the bumper from different angles. Check that the gaps between the bumper, grille, and fenders are even from side to side. Open and close the hood to verify adequate clearance, then turn the steering wheel from lock to lock to ensure there is no interference with the tires or suspension components.
Review every mounting bolt one final time to confirm it has been tightened to specification. It's also a good idea to inspect the wiring underneath the truck, ensuring nothing has shifted while the bumper was being installed.
Finish by taking the truck for a short drive. Listen for rattles or vibrations and verify that all electronic systems continue operating normally. After returning home, perform one more visual inspection and consider checking the mounting hardware again after the first few hundred miles of driving as everything settles into place.
Inspect the Bumper Alignment
Before calling the installation complete, take a step back and inspect the bumper from several different angles. A careful visual inspection can help you catch small alignment issues before they become noticeable every time you walk up to the truck.
As you look things over, check for:
- Even gaps between the bumper and surrounding body panels
- Proper centering beneath the grille
- A level appearance across the front of the truck
- Adequate clearance around the headlights and hood
If something looks slightly off, now is the time to make any final adjustments before everything is fully buttoned up.
Double-Check the Mounting Hardware
After confirming the fitment, go back and inspect all of the mounting bolts and brackets one more time. It's easy to overlook a fastener during installation, especially after making alignment adjustments.
Be sure to look for:
- Loose or under-tightened hardware
- Brackets that aren't fully seated
- Mounting points that appear uneven or out of alignment
Taking a few extra minutes to verify everything is secure can help prevent rattles, movement, or premature wear once you're back on the road.
Test All Electrical Components
Reconnect the battery, start the truck, and verify that every electrical feature integrated into the bumper is functioning properly before your first drive.
Depending on your Silverado's equipment, check the operation of:
- Fog lights
- Parking sensors
- Front-facing camera
- Adaptive cruise control or other driver assistance features
- Auxiliary lighting
If any warning lights or error messages appear, address them before driving the vehicle. Confirming that everything works properly now will save time and help ensure your new bumper performs exactly as intended.

Practical Tips for a Smooth Bumper Installation
Every installation teaches something new, but experienced truck owners tend to follow a few best practices that consistently produce better results.
Never tighten the mounting bolts immediately after hanging the bumper. Leaving the hardware loose until the alignment is finalized gives you the flexibility needed to achieve even body gaps.
Keep all factory hardware organized throughout the project, even if the new bumper includes replacement fasteners. Certain brackets or clips may still need to be reused.
Protect painted surfaces with blankets or cardboard while handling the bumper. Even powder-coated steel can be scratched if it's accidentally dragged across concrete or another hard surface.
If your truck is equipped with parking sensors or front-facing cameras, double-check their operation before considering the installation complete. These systems are much easier to troubleshoot while everything is still accessible.
Finally, don't rush. A bumper installation isn't a race. Spending an extra hour perfecting the fitment is far better than living with uneven panel gaps every time you walk up to your truck.
Use a Helper
Heavy-duty steel bumpers are much easier to install with two people. A helper can assist with lifting, positioning, and starting hardware while reducing the risk of accidental damage.
Understand the Added Weight
Steel bumpers weigh considerably more than factory bumper assemblies. Depending on the bumper and accessories installed, some owners may notice minor changes in front-end ride height or suspension characteristics.
Plan Your Time
Installation time varies depending on truck configuration and experience level. Trucks equipped with advanced sensors, cameras, and lighting systems often require additional installation time compared to base-model trucks.
Key Takeaways on Bumper Installation
Installing a replacement bumper is one of the most rewarding upgrades you can make to your Silverado, especially when it's done correctly. Remember these key points before starting your project:
- Verify compatibility before purchasing a replacement bumper
- Read the installation instructions before picking up a wrench
- Disconnect electrical components carefully during removal
- Clean and inspect the frame before installing the new bumper
- Leave mounting hardware loose until final alignment is complete
- Test all lights, sensors, and electronics before finishing the installation
- Recheck mounting hardware after the first few hundred miles
FAQ About Installing a Replacement Bumper
-
Can I install a replacement bumper myself?
Yes, many Silverado owners complete the installation in their own garage. Because heavy-duty bumpers can weigh well over 100 pounds, having a second person assist with lifting and alignment is strongly recommended.
-
How long does a Chevrolet Silverado 1500 replacement bumper installation take?
For most DIY installers, expect the project to take between three and six hours depending on the bumper design, your experience level, and whether factory sensors or lighting need to be transferred.
-
Will my factory parking sensors still work?
Most premium aftermarket bumpers are engineered to retain factory parking sensors when equipped with the proper sensor provisions. Always verify compatibility before purchasing your bumper.
-
Do I need a torque wrench?
Absolutely. Tightening hardware to the manufacturer's specified torque values helps ensure the bumper is securely mounted and prevents under-tightening or over-tightening critical fasteners.
-
Should I recheck the hardware after installation?
It's a good idea to inspect and retorque the mounting bolts after the first few hundred miles of driving to account for normal settling.
-
How much does it cost to replace a bumper on a Chevy Silverado 1500?
The cost of a Chevy Silverado 1500 bumper replacement varies depending on the bumper style, materials, and whether you install it yourself or hire a professional. Heavy-duty steel bumpers can cost more than factory-style replacements but offer increased protection, durability, and accessory mounting options.
-
Do Ranch Hand bumpers bolt on?
Yes. Most Ranch Hand bumpers are designed as bolt-on replacements that mount to existing frame locations, eliminating the need for major vehicle modifications. Always refer to the specific installation instructions for your bumper model, as requirements can vary by vehicle application.