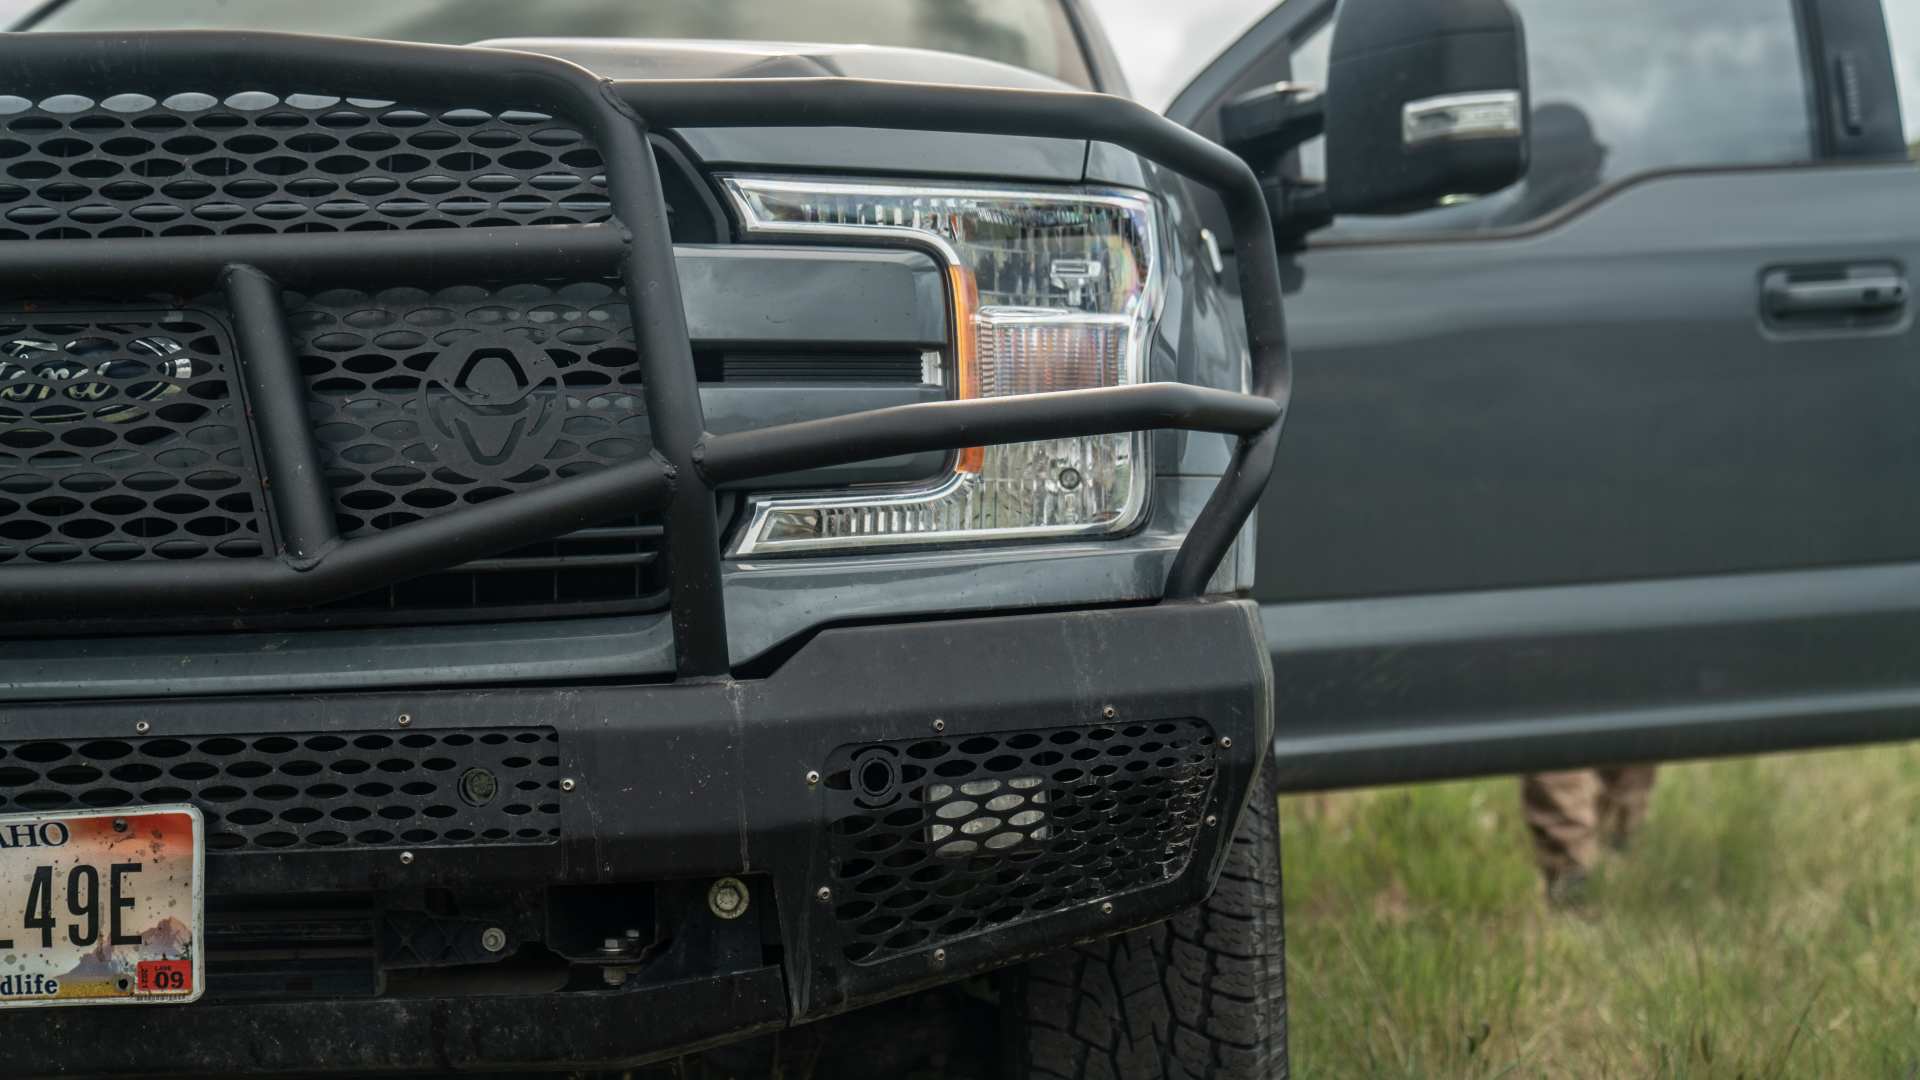
Whether your factory bumper has been damaged, you're looking for increased front-end protection, or you simply want a more aggressive appearance, upgrading to a heavy-duty steel bumper is one of the most popular modifications for a Ford F-150.
A quality aftermarket bumper can help protect your truck from impacts, improve durability in demanding work environments, and provide mounting locations for accessories such as auxiliary lighting and recovery equipment. For many truck owners, a heavy-duty bumper also delivers the rugged appearance they want without sacrificing functionality.
This guide walks through the general process of a Ford F-150 front bumper replacement, including removing the factory bumper and installing a heavy-duty replacement bumper such as a Ranch Hand front bumper.
- What to Know Before You Start
- Tools & Materials Needed
- Removing the Factory Bumper
- Preparing Your Truck for a New Bumper
- Installing the Replacement Bumper
- Reconnecting Sensors & Electronics
- Final Checks & Alignments
- Aftermarket Bumper Installation Tips
- Key Takeaways
- FAQ About Ford F-150 Replacement Bumpers
What to Know Before You Start
Replacing the factory bumper on a Ford F-150 is a straightforward project for many truck owners, but proper preparation can make the difference between a smooth installation and a frustrating weekend in the garage.
Before ordering a replacement bumper, verify compatibility with your specific truck. Ford F-150 models are available in numerous configurations, and bumper fitment can vary based on model year, trim level, engine package, and factory equipment. Features such as parking sensors, adaptive cruise control, front cameras, fog lights, and tow hooks may require specific bumper provisions or additional mounting components.
It is also important to understand that heavy-duty steel bumpers are substantially heavier than the factory bumper assembly. While that additional weight contributes to improved protection and durability, it also means extra care should be taken during installation. Attempting to remove or install a bumper alone can increase the risk of personal injury or vehicle damage.
Before beginning work, park the truck on a flat, stable surface and set the parking brake. Disconnect the negative battery cable to prevent accidental electrical issues while working with sensors, lighting systems, or wiring harnesses. Organizing hardware and reading the complete installation instructions beforehand can help avoid surprises once the project is underway.
Finally, review any warranty documentation and manufacturer recommendations. Proper installation helps ensure the bumper performs as intended and allows integrated vehicle systems to continue functioning correctly.
Verify Vehicle Compatibility
Before beginning your Ford F-150 replacement bumper installation, verify that the replacement bumper is designed specifically for your truck.
Factors that can affect compatibility include:
- Model year
- Trim level
- Engine package
- Tow package
- Parking sensor configuration
- Adaptive cruise control equipment
- Factory fog lights
- Camera systems
Always confirm fitment before ordering parts or beginning disassembly.

Safety Considerations
Factory bumpers are relatively lightweight compared to heavy-duty steel replacements. Once assembled, an aftermarket bumper can be difficult to maneuver alone.
For a safe installation:
- Park on a level surface
- Set the parking brake
- Wear safety glasses and gloves
- Disconnect the negative battery cable
- Use a second person when lifting or positioning the bumper
Warranty and Fitment Considerations
Read all manufacturer instructions before installation. Improper installation may affect product performance, vehicle safety systems, or warranty coverage.
If your truck includes advanced driver assistance features, verify compatibility before purchasing a replacement bumper.
Tools & Materials Needed
Having the proper tools within reach before starting the installation will help keep the project moving efficiently and reduce unnecessary trips back and forth to the toolbox.
Most Ford F-150 front bumper replacements can be completed with common hand tools, including a ratchet and socket set, combination wrenches, screwdrivers, trim removal tools, and a torque wrench. A torque wrench is particularly important because it allows mounting hardware to be tightened properly without overloading fasteners or brackets.
Several optional tools can make the installation easier. A floor jack or transmission jack can help support the bumper during removal and installation. A magnetic parts tray can keep hardware organized, while a cordless impact driver can speed up the removal of factory fasteners. Adequate lighting is also helpful when working around frame rails, wiring harnesses, and mounting brackets.
Before beginning, unpack the replacement bumper and verify that all hardware, brackets, mounting plates, and accessories are included. If the bumper accepts factory sensors or lighting components, identify those mounting locations in advance so you understand which factory parts will need to be transferred during the installation process.
Spending a few minutes organizing parts and tools before starting often saves significant time later in the project.
Required Tools
Most installations require:
- Ratchet and socket set
- Combination wrenches
- Torque wrench
- Trim removal tools
- Screwdrivers
- Pliers
- Work gloves
- Safety glasses
Helpful Optional Tools
While not required, these tools can make the job easier:
- Floor jack
- Jack stands
- Rolling work table
- Magnetic parts tray
- Shop light
- Cordless impact driver
Components and Hardware
Depending on the bumper model, your kit may include:
- Mounting brackets
- Frame mounting hardware
- Sensor mounting components
- Light mounting provisions
- License plate bracket
- Installation instructions
Verify all hardware is present before beginning assembly.

Removing the Factory Bumper
The first major step in a Ford F-150 front bumper replacement is safely removing the factory bumper assembly and disconnecting any integrated electrical components.
Modern F-150 bumpers frequently house several electronic systems. Depending on the truck's trim level and equipment package, these may include fog lights, parking sensors, front cameras, adaptive cruise control sensors, or other wiring harnesses. Before loosening mounting hardware, disconnect these components carefully. Avoid pulling on wiring directly. Instead, release connectors using the locking tabs provided by Ford and secure the harnesses away from the work area.
Once electrical connections have been disconnected, locate the factory bumper mounting hardware. Most bumper assemblies are secured to the frame using a combination of brackets and large mounting bolts. Depending on the truck configuration, additional splash shields, trim panels, or lower valances may need to be removed for access.
Because the bumper can shift as hardware is removed, many installers leave a few bolts partially threaded until the assembly is fully supported. This helps prevent the bumper from unexpectedly dropping or twisting during removal.
After all hardware has been removed, carefully slide the bumper assembly away from the vehicle. Having a second person available can make this process significantly easier, especially when trying to avoid contact with painted body panels or grille components.
As the bumper comes off, take note of wiring routing, sensor locations, and any factory brackets that may need to be reused later. Photos taken during disassembly can be extremely helpful during reassembly.
Disconnect Electrical Components
Depending on your truck's equipment level, disconnect:
- Fog light wiring
- Parking sensor harnesses
- Front camera wiring
- Adaptive cruise control components
- Auxiliary lighting connectors
Carefully release all clips and connectors. Avoid pulling directly on wiring harnesses.
Remove Factory Fasteners
With electrical connections disconnected, locate the factory mounting hardware securing the bumper to the frame.
As hardware is removed:
- Support the bumper assembly
- Keep hardware organized
- Watch for hidden fasteners behind trim panels or splash shields
Many installers find it helpful to leave a few mounting bolts partially threaded until the bumper is fully supported.
Remove the Bumper Assembly
Once all mounting hardware has been removed, carefully pull the bumper away from the vehicle.
If working alone, use a jack or support stand to prevent the bumper from dropping unexpectedly.
Avoid Common Removal Mistakes
During removal, be careful not to:
- Stretch wiring harnesses
- Damage sensor connectors
- Bend mounting brackets
- Misplace factory hardware
- Scratch painted body panels
Taking your time during removal helps simplify installation later.

Preparing the Truck for the New Bumper
With the factory bumper removed, take advantage of the open access to inspect the front of the truck before installing the replacement bumper.
Start by examining the frame horns, mounting brackets, and attachment points. Look for signs of damage, corrosion, bent metal, or worn hardware that could affect installation. Even minor alignment issues can make bumper positioning more difficult later. Cleaning dirt, road debris, and rust from mounting surfaces helps ensure proper fitment and accurate alignment.
If the replacement bumper is designed to retain factory equipment, now is the time to transfer those components. Depending on the bumper model, this may include parking sensors, fog lights, tow hooks, front cameras, or other accessories. Sensor relocation requires special attention because orientation often affects performance. Marking sensor locations before removal can help ensure they are reinstalled correctly.
Many heavy-duty bumpers also require partial assembly before installation. Light brackets, sensor bezels, mounting brackets, winch trays, and other accessories are often easier to install while the bumper is still on a workbench rather than once it is mounted to the truck.
Taking the time to complete pre-assembly work now typically results in a faster and cleaner final installation.
Inspect Frame Mounting Locations
Check the frame horns and mounting points for:
- Bent brackets
- Corrosion
- Damaged threads
- Debris buildup
Clean mounting surfaces as needed to ensure proper bumper alignment.
Transfer Factory Components
Many aftermarket bumpers are designed to retain factory equipment.
Depending on the bumper model, you may need to transfer:
- Parking sensors
- Tow hooks
- Fog lights
- Front camera systems
- License plate brackets
Follow the bumper manufacturer's instructions carefully when relocating sensors to ensure proper operation.
Complete Pre-Assembly
Some heavy-duty bumpers require partial assembly before installation.
This may include:
- Installing mounting brackets
- Attaching sensor bezels
- Installing light brackets
- Mounting auxiliary lighting
Completing these steps on a workbench is typically easier than doing them once the bumper is on the truck.
Installing the Replacement Bumper
Installing a heavy-duty replacement bumper is often the most rewarding part of the project because the truck begins to take on its new appearance.
Due to the weight of most steel bumpers, having a helper available is highly recommended. Carefully lift the bumper into position and align it with the mounting brackets and frame attachment points. Some installers use a floor jack to help support the bumper while making alignment adjustments.
Begin by installing mounting hardware loosely. This allows the bumper to shift slightly while gaps and clearances are adjusted. Before tightening any fasteners, step back and evaluate the bumper's position relative to the grille, headlights, fenders, and hood.
Look for consistent spacing from side to side and verify that the bumper sits level across the front of the truck. Small adjustments made now can significantly improve the finished appearance.
Once alignment is satisfactory, gradually tighten hardware while periodically rechecking bumper position. Alternating between mounting points helps distribute clamping force evenly and minimizes the chance of the bumper shifting during tightening.
Follow the manufacturer's recommendations for tightening procedures and final torque values. Properly tightened hardware helps ensure long-term durability and reliable performance under demanding conditions.
Position the Bumper
Using a helper, carefully raise the bumper into position and align it with the frame mounting locations.
If available, a floor jack can help support the bumper while adjustments are made.
Align Mounting Points
Before tightening any hardware:
- Verify equal gaps on both sides
- Check clearance around headlights
- Confirm hood operation
- Ensure the bumper sits level
Leave mounting hardware slightly loose until final alignment is achieved.
Secure Hardware
Once alignment is correct:
- Start all fasteners by hand.
- Tighten hardware gradually.
- Alternate between mounting points.
- Recheck alignment during tightening.
This approach helps prevent the bumper from shifting during installation.
Torque Hardware Properly
Always tighten hardware according to the manufacturer's recommendations.
Avoid overtightening fasteners, which can damage hardware, mounting brackets, or frame attachment points.

Reconnecting Electronics and Accessories
With the bumper securely mounted, attention can turn to restoring the truck's electrical systems and accessory components.
Reconnect all factory wiring harnesses that were removed during disassembly. Depending on the truck, this may include parking sensors, fog lights, cameras, adaptive cruise control equipment, or other electrical connections. Verify that connectors are fully seated and that locking tabs engage properly.
Before securing wiring permanently, inspect routing carefully. Harnesses should be kept away from moving parts, sharp edges, heat sources, and suspension components. Using factory-style attachment points whenever possible helps protect wiring from vibration and long-term wear.
If the bumper includes provisions for auxiliary lighting or additional accessories, complete those installations according to the manufacturer's instructions. Verify that all mounting hardware is secure and that lighting components are aimed appropriately.
Finally, reinstall the license plate bracket if required and confirm that it does not obstruct sensors, lighting, airflow, or other vehicle systems.
Reinstall Lights and Sensors
Reconnect:
- Fog lights
- Parking sensors
- Front camera systems
- Auxiliary lighting
- Additional accessories
Ensure connectors fully lock into place.
Verify Wiring Routing
Inspect all wiring before completing installation.
Make sure wiring:
- Is properly secured
- Avoids sharp edges
- Does not contact moving parts
- Is protected from heat sources
Proper wire routing helps prevent future electrical issues.
Install License Plate Components
If applicable, reinstall the license plate bracket and verify it does not interfere with sensors, lights, or airflow.

Final Checks & Adjustments
Before considering the installation complete, perform a thorough inspection of the entire assembly.
Start with a visual review. Stand in front of the truck and inspect the bumper from multiple angles. Confirm that body gaps appear consistent, the bumper sits level, and adequate clearance exists around the grille, headlights, and fenders.
Next, verify that all mounting hardware has been tightened properly. Recheck critical fasteners and inspect mounting brackets for any signs of movement or misalignment.
Once the physical inspection is complete, reconnect the battery and test all electrical systems. Verify proper operation of fog lights, parking sensors, cameras, adaptive cruise functions, and any aftermarket lighting that was installed.
If the truck displays warning lights or sensor faults, inspect connections and component orientation before assuming a larger problem exists. In many cases, a loose connector or improperly seated sensor is the source of the issue.
Completing a careful final inspection helps ensure the truck is ready for daily driving, towing, work use, or off-road adventures.
Check Visual Alignment
Inspect the bumper from multiple angles.
Verify:
- Consistent body gaps
- Proper centering
- Level positioning
- Adequate headlight clearance
Confirm Hardware Security
Recheck all mounting hardware and bracket fasteners.
Look for:
- Loose hardware
- Improperly seated brackets
- Misaligned mounting points
Test Electrical Systems
Start the truck and verify proper operation of:
- Fog lights
- Parking sensors
- Cameras
- Adaptive cruise functions
- Auxiliary lighting
Address any warning messages before driving the vehicle.

Practical Tips for a Smooth Bumper Installation
Although bumper installation is generally straightforward, a few practical considerations can make the process easier.
One of the most valuable resources is simply having another person available. Heavy-duty steel bumpers are awkward to maneuver and difficult to align precisely without assistance. A helper can hold the bumper steady while hardware is started, reducing frustration and helping prevent accidental damage.
It is also helpful to leave hardware slightly loose until all mounting points have been started. Tightening one side completely before the bumper is aligned often creates unnecessary adjustment challenges later.
Truck owners upgrading from a factory bumper should also understand that steel bumpers add significant weight to the front of the vehicle. While this added mass contributes to protection and durability, it can slightly affect ride characteristics depending on the bumper design and additional accessories installed.
Installation time varies considerably depending on vehicle configuration, experience level, and the amount of sensor integration involved. Trucks equipped with cameras, parking sensors, adaptive cruise control, and auxiliary lighting generally require more installation time than base-model trucks with fewer electronic components.
Patience, preparation, and attention to detail are often more important than specialized mechanical skills.
Use a Helper
Heavy-duty steel bumpers are much easier to install with two people. A helper can assist with lifting, positioning, and starting hardware while reducing the risk of accidental damage.
Understand the Added Weight
Steel bumpers weigh considerably more than factory bumper assemblies. Depending on the bumper and accessories installed, some owners may notice minor changes in front-end ride height or suspension characteristics.
Plan Your Time
Installation time varies depending on truck configuration and experience level. Trucks equipped with advanced sensors, cameras, and lighting systems often require additional installation time compared to base-model trucks.
Key Takeaways on Bumper Installation
A properly executed Ford F-150 front bumper replacement provides more than just a visual upgrade. Heavy-duty steel bumpers offer increased front-end protection, improved durability, and the ability to support work-oriented accessories such as auxiliary lighting, recovery equipment, and other truck accessories.
Successful installation begins with proper preparation, including verifying fitment, organizing tools, and understanding how factory electronics will be transferred. Careful removal of the factory bumper, thorough inspection of mounting points, proper alignment during installation, and complete testing of all vehicle systems contribute to professional-looking results.
Many DIY truck owners can successfully complete a bumper installation at home with basic hand tools and a helper. However, professional installation may be worthwhile for trucks equipped with extensive sensor systems, advanced driver-assistance technology, or other integrated electronic features.
When installed correctly, a Ranch Hand bumper can provide years of dependable protection while preserving the functionality and capability of your Ford F-150.
FAQ About Installing a Replacement Bumper
-
Is a Ford F-150 front bumper replacement difficult?
Most mechanically inclined truck owners can complete a bumper replacement with basic hand tools and a helper. Trucks equipped with advanced electronics may require additional know-how during installation.
-
Can I reuse my factory parking sensors?
Many Ranch Hand bumpers are designed to accept factory parking sensors. Always verify compatibility with the bumper manufacturer before installation.
-
Can I replace my front bumper myself?
Yes. Most Ford F-150 owners with basic mechanical experience and common hand tools can install a replacement bumper at home, though having a helper is strongly recommended when lifting and aligning a heavy-duty steel bumper.
-
Will a replacement bumper affect my truck's electronics?
When installed correctly and designed for your specific vehicle configuration, most quality aftermarket bumpers allow continued use of factory sensors, lights, and other integrated systems.
-
How often should I inspect the bumper after installation?
Check mounting hardware after the first several hundred miles and inspect the bumper periodically as part of normal vehicle maintenance.
-
How much does it cost to replace a bumper on a Ford F-150?
The cost of a Ford F-150 bumper replacement varies depending on the bumper style, materials, and whether you install it yourself or hire a professional. Heavy-duty steel bumpers can cost more than factory-style replacements but offer increased protection, durability, and accessory mounting options.
-
Do Ranch Hand bumpers bolt on?
Yes. Most Ranch Hand bumpers are designed as bolt-on replacements that mount to existing frame locations, eliminating the need for major vehicle modifications. Always refer to the specific installation instructions for your bumper model, as requirements can vary by vehicle application.
-
How long does it take to install a Ranch Hand bumper?
Installation time varies depending on the vehicle and bumper model, but most Ranch Hand bumper installations can be completed in a few hours with basic hand tools and a helper. Trucks equipped with parking sensors, cameras, or other integrated electronics may require additional time.