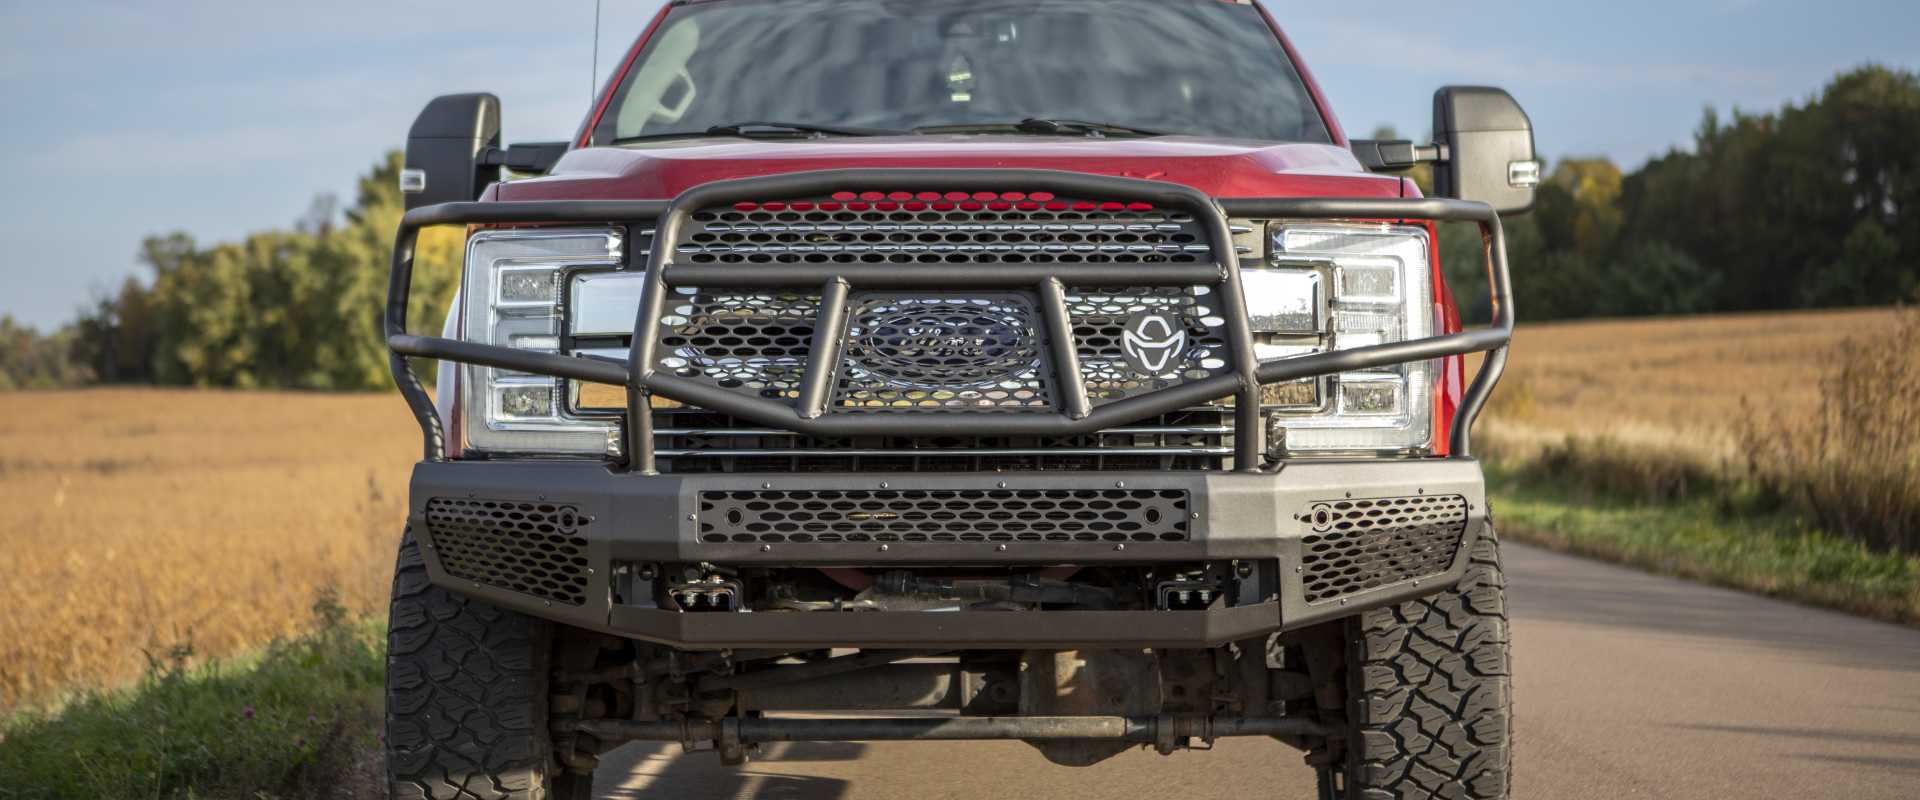
Replacing the factory front bumper on a modern Ford F-250 Super Duty or Ford F-350 Super Duty is one of the most impactful upgrades truck owners can make for durability, protection, and long-term functionality. Whether the truck is used for towing equipment, traveling rough backroads, ranch work, construction sites, or everyday driving, the front bumper takes constant abuse from debris, weather, and unexpected impacts.
Factory bumpers are designed to satisfy a wide range of priorities, including styling, weight savings, aerodynamics, and manufacturing efficiency. Heavy-duty truck owners often demand more. That is where a replacement bumper from Ranch Hand comes into the picture.
A Ranch Hand bumper is built with substantially heavier steel construction and reinforced mounting systems designed to provide increased front-end protection while maintaining compatibility with many factory features and electronics. For many Super Duty owners, upgrading the front bumper is not simply about appearance. It is about building a truck that is better prepared for the environments it actually operates in.
This guide provides a high-level walkthrough of the typical process involved in a Ford F-250 or F-350 bumper replacement and Ranch Hand front bumper installation. It is not intended to replace the official installation manual, but it can help truck owners understand the tools, preparation, labor, and major installation stages involved before starting the project.
- Ford F-250 Front Bumper Installation How-To Video
- Why Replace Your Factory Bumper?
- What to Know Before You Start
- Tools Needed for F-250 & F-350 Bumper Replacement
- Key Components Involved in a Front Bumper Swap
- Factory Bumper Removal Overview
- Preparing Your Truck for a Ranch Hand Bumper
- High-Level Ranch Hand Front Bumper Installation Process
- Alignment, Fitment, and Final Checks
- Professional Tips from Ranch Hand Installers
- Key Takeaways for F-250 / F-350 Owners
- Frequently Asked Questions
Why Replace the Factory Bumper?
Factory bumpers on modern Super Duty trucks are designed to meet a wide range of priorities, including styling, weight reduction, aerodynamics, and production efficiency. For truck owners who routinely tow, travel gravel roads, work on ranches, or operate in construction environments, a factory bumper may not provide the level of protection they want from a heavy-duty truck.
A replacement steel bumper can offer several advantages, including:
- Increased front-end protection
- Improved durability in demanding environments
- Better resistance to impacts and debris
- Integrated provisions for lighting and accessories
- Enhanced approach angles and ground clearance
- A more aggressive, purpose-built appearance
For many Super Duty owners, a heavy-duty front bumper upgrade becomes a practical investment in the truck’s long-term durability and functionality.

What to Know Before You Start
Before beginning a Ford F-250 or F-350 bumper installation, it is important to understand that modern Super Duty trucks are far more complex than older pickup platforms. The front bumper assembly often contains multiple electronic systems, sensors, brackets, wiring harnesses, and structural components that must all be handled correctly during removal and installation.
Verify Vehicle Compatibility
Late-model Ford Super Duty trucks can vary significantly depending on:
- Model year
- Trim level
- Engine package
- Sensor configuration
- Adaptive cruise control availability
- Fog light setup
- Tow hook configuration
Even trucks that appear nearly identical externally may use different mounting systems or electronics behind the bumper assembly. Before installation begins, verify that the bumper is designed specifically for the truck’s exact year and configuration.
Using the wrong bumper or bracket kit can create alignment issues, sensor problems, or mounting incompatibilities.
Plan for a Safe Workspace
One of the first things installers notice during a Ranch Hand front bumper install is the weight difference compared to the factory bumper.
Heavy-duty steel bumpers are significantly heavier and bulkier than OEM assemblies. Because of this, installation usually requires:
- At least two people
- A floor jack, transmission jack, or lifting device
- A large and level work area
- Proper support stands
Trying to install a bumper alone can make alignment extremely difficult and increase the risk of damaging the truck, bumper finish, or wiring components.
Expect the Installation to Take Time
Even experienced installers should set aside several hours for the installation process. Trucks equipped with multiple sensors, cameras, adaptive cruise systems, or auxiliary lighting may require additional time for transferring components and routing wiring properly.
Rushing the installation can lead to alignment problems, damaged connectors, or improperly seated hardware.
Disconnect the Battery Before Beginning
Because modern bumpers integrate several electrical systems, disconnecting the negative battery cable before starting the installation is a good precautionary step. This can help reduce the risk of electrical issues while disconnecting sensors and wiring harnesses.

Tools Needed for Ford F-250 / F-350 Bumper Replacement
Before beginning a Ford F-250 or F-350 bumper replacement, it is important to have the proper tools and equipment ready. Because modern Super Duty trucks use large hardware, integrated electronics, and heavy bumper assemblies, having the right setup can make the installation process safer, smoother, and far less frustrating.
While exact tool requirements may vary depending on the truck configuration and Ranch Hand bumper model, most installations typically require a combination of common hand tools, lifting assistance, and basic electrical tools.
Common Hand Tools
Most Ranch Hand front bumper installs will require standard automotive hand tools, including:
- Socket set with metric and standard sizes
- Ratchets and breaker bars
- Torque wrench
- Combination wrenches
- Screwdrivers
- Trim or panel removal tools
- Pliers and needle nose pliers
- Allen or hex keys, if applicable
Because some factory bumper hardware can be tight or exposed to corrosion, longer-handled ratchets or breaker bars are often helpful during removal.
Lifting and Support Equipment
Heavy-duty steel bumpers are significantly heavier than OEM bumper assemblies, making lifting assistance strongly recommended.
Helpful equipment may include:
- Floor jack
- Transmission jack
- Adjustable jack stands
- Work table or support stands
- Moving blankets or protective pads
Many installers use a floor jack or transmission jack to help hold the bumper during positioning and alignment. This can make fine adjustments much easier while reducing strain during installation.
Electrical and Wiring Tools
Late-model Ford Super Duty trucks often include multiple electrical systems integrated into the front bumper assembly. Depending on the truck configuration, installers may need tools for handling:
- Parking sensor wiring
- Fog light connectors
- Adaptive cruise components
- Auxiliary lighting
Common electrical tools may include:
- Wire clips or zip ties
- Electrical tape
- Trim clip removal tools
- Flashlight or work light
Keeping wiring organized throughout the installation process can help prevent pinched harnesses, damaged connectors, or sensor issues later.
Safety Equipment
Because bumper installations involve heavy components and working underneath the front of the truck, safety equipment should never be overlooked.
Recommended safety equipment includes:
- Safety glasses
- Work gloves
- Steel-toe boots
- Wheel chocks
If the truck is being lifted, always ensure it is properly supported before working underneath or around the front end.
Why Proper Tools Matter
One of the biggest mistakes during a heavy-duty truck bumper installation is attempting the job without adequate tools or lifting support. Having the proper equipment not only makes the process easier, but can also help prevent:
- Damaged hardware
- Scratched paint or powder coat finishes
- Improper bumper alignment
- Broken clips or connectors
- Personal injury during lifting or positioning
For many installers, preparation is what separates a frustrating installation from a smooth, professional-looking final result.

Key Components Involved in a Front Bumper Swap
A modern Ford Super Duty front bumper assembly contains far more than exterior trim pieces. Understanding what components are integrated into the factory bumper can help installers prepare for the removal and transfer process.
Factory Components Commonly Removed
Depending on the truck, the OEM bumper assembly may include:
- Parking sensors
- Fog lights
- Adaptive cruise control modules
- Wiring harnesses
- Tow hooks
- Factory brackets and mounting hardware
- Air dam components
Components Included with a Ranch Hand Front Bumper
A heavy-duty replacement bumper generally includes:
- Main bumper assembly
- Mounting brackets
- Hardware kits
- Sensor provisions
- Lighting accommodations
Because bumper systems vary by application, installers should inventory all hardware and components before beginning assembly. Organizing bolts, washers, and brackets ahead of time can make the installation process far smoother later.

Overview of the Factory Bumper Removal Process
Removing the factory bumper from a Ford F-250 or F-350 typically involves several major steps.
1. Disconnect Electrical Components
Before any bumper hardware is removed, installers usually disconnect electrical connections associated with:
- Parking sensors
- Fog lights
- Adaptive cruise systems
- Front camera systems, if equipped
Carefully labeling connectors during removal can make reinstallation significantly easier later.
2. Remove Lower Air Dam Components
Many late-model F-250 and F-350 trucks use lower air dam panels and trim sections beneath the bumper assembly. These components are typically secured with clips, push fasteners, and bolts that must be removed before accessing the primary bumper hardware.
Depending on trim level, some splash shields or lower valance components may also need to be removed temporarily.
3. Remove Tow Hooks and Factory Brackets
Factory tow hooks and mounting brackets are often integrated into the bumper support structure. During removal, installers may need to unbolt these components from the frame rails before the bumper itself can be detached. Hardware should be kept organized throughout this stage since certain factory fasteners may be reused later.
4. Unbolt and Remove the Factory Bumper
Once wiring and brackets are disconnected, the factory bumper can typically be unbolted from the frame horns and carefully removed.
Because the bumper assembly is large and somewhat awkward to maneuver, having a second person assist with removal helps prevent accidental damage to the truck or surrounding components.
5. Preserve Factory Hardware When Needed
Certain factory fasteners or brackets may be reused during the Ranch Hand front bumper install process. Keeping hardware organized during removal can save considerable time during reassembly.
Preparing the Truck for a Ranch Hand Bumper
Once the factory bumper is removed, preparation becomes one of the most important parts of the installation process.
1. Transfer Sensors and Accessories
Modern bumper replacements often require transferring factory electronics and accessories into the new bumper assembly. This may include:
- Parking sensors
- Fog lights
- Wiring harnesses
- Adaptive cruise hardware
Care should be taken to avoid damaging sensor clips, wiring, or connectors during transfer.
2. Organize Hardware and Components
Separating factory hardware from new installation hardware helps reduce confusion during assembly. Many installers organize fasteners by installation stage to simplify the process.
3. Dry-Fit Components Before Final Tightening
Before fully tightening any hardware, installers commonly perform a dry fit of the mounting brackets and bumper assembly. This helps confirm:
- Proper bracket alignment
- Sensor fitment
- Clearance around grille and fenders
- Overall positioning

High-Level Ranch Hand Front Bumper Installation Process
While exact procedures vary by bumper model, most Ranch Hand front bumper installations follow a similar sequence. After the factory bumper has been removed and the truck has been prepped, the installation process generally shifts toward bracket assembly, bumper positioning, alignment, and reconnecting factory electronics.
1. Install Mounting Brackets
The installation process generally begins with attaching the supplied mounting brackets to the truck frame using the provided hardware. Depending on the Ranch Hand bumper model and truck configuration, this may include multiple side brackets, support plates, reinforcement components, and frame spacers that all work together to create a secure mounting foundation for the bumper.
At this stage, hardware is often left slightly loose to allow adjustment during final alignment. This is an important part of the process because even small changes in bracket positioning can affect bumper height, grille clearance, and overall fitment across the front of the truck.
Installers typically verify that the brackets sit evenly on both sides of the frame and that all mounting points line up properly before moving forward. Taking the time to organize hardware and loosely assemble components first can help simplify final alignment later in the installation.
2. Lift and Position the Bumper
Because heavy-duty steel bumpers are substantially heavier than OEM units, lifting equipment or multiple installers are strongly recommended. Ranch Hand bumpers are designed for strength and durability, but that added steel construction also makes them significantly more difficult to maneuver than the factory bumper assembly.
The bumper is then carefully positioned onto the mounting brackets and aligned with:
- Fenders
- Headlights
- Grille openings
- Body lines
During this stage, installers typically make small side-to-side and height adjustments to ensure the bumper sits level and centered on the truck. Proper alignment is important not only for appearance, but also for maintaining adequate clearance around the grille, headlights, and lower body components.
Many installers use adjustable stands, floor jacks, or transmission jacks to help support the bumper during positioning. This allows for more precise adjustments while reducing strain and making it easier to hold the bumper in place as hardware is installed.
3. Secure Hardware and Tighten Fasteners
Once alignment is confirmed, hardware can be tightened according to the manufacturer’s installation instructions and factory torque specifications.
Rather than fully tightening one mounting point at a time, installers typically tighten hardware gradually across all mounting locations while continuing to monitor alignment. This helps maintain consistent spacing and prevents the bumper from shifting as the hardware seats against the brackets and frame mounts.
Throughout the tightening process, installers generally continue checking:
- Fender gap consistency
- Headlight clearance
- Grille alignment
- Level positioning
- Overall bumper centering
Exact torque values should always be referenced from the product-specific installation manual. Properly tightening all hardware is critical for ensuring the bumper remains secure under towing, off-road driving, and everyday road vibration.
4. Reconnect Wiring and Sensors
After the bumper is mounted, all electrical systems should be reconnected and tested, including:
- Fog lights
- Parking sensors
- Adaptive cruise systems
- Cameras or lighting accessories
This stage is especially important on modern Ford Super Duty trucks because many factory safety and driver-assistance systems rely on proper sensor positioning and wiring connections to function correctly.
Installers typically inspect wiring harness routing carefully to ensure wires are not pinched, stretched, or positioned near moving or high-heat components. Loose wiring should also be properly secured to prevent rubbing or vibration damage over time.
Once everything has been reconnected, the truck can be powered on and tested to verify that all electronics function properly and that no warning lights or sensor errors appear on the dashboard before the installation is considered complete.
Alignment, Fitment, and Final Checks
Before driving the truck, installers should carefully inspect the bumper installation.
1. Verify Proper Fitment
Check for:
- Even spacing between body panels
- Proper bumper height and level positioning
- Adequate tire and suspension clearance
- Secure mounting points
2. Test Electrical Components
Confirm that all transferred systems function correctly, including:
- Parking sensors
- Fog lights
- Adaptive cruise control
- Cameras
- Warning indicators
If any dashboard warnings appear after installation, sensor positioning or wiring connections may need to be rechecked.
3. Perform a Final Hardware Inspection
After installation is complete, all mounting hardware should be inspected one final time to confirm proper tightness and seating before the vehicle is driven.

Professional Tips from Ranch Hand Installers
Heavy-duty truck bumper installation is manageable for experienced DIYers, but there are a few common challenges Super Duty owners should be aware of.
1. Sensor Systems Require Extra Attention
Modern Ford trucks rely heavily on integrated sensor systems. Improper sensor positioning can lead to:
- Warning lights
- False sensor readings
- Adaptive cruise issues
- Parking assist malfunctions
Taking extra time during sensor transfer and alignment can help avoid troubleshooting later.
2. Expect Tight Clearances Around the Front End
Late-model Ford Super Duty trucks have tight tolerances around the grille, headlights, and body lines. Even small alignment changes during installation can noticeably affect fitment.
Taking additional time during final alignment usually results in a cleaner, more professional-looking installation.
3. The Weight of the Bumper Matters
Heavy-duty steel bumpers are not easy to maneuver alone. Even experienced installers typically recommend:
- At least two people
- A lifting device
- Adjustable support stands during alignment
4. Professional Installation May Be Worth Considering
For trucks equipped with advanced electronics, front cameras, or adaptive cruise systems, professional installation may help reduce the risk of fitment or calibration issues.
Owners without access to lifting equipment or a large workspace may also benefit from having the installation completed by a qualified shop.
Using Ranch Hand Resources
One of the most important parts of any Ranch Hand front bumper install is following the product-specific installation instructions provided for the exact bumper model.
Installation manuals can help clarify:
- Hardware orientation
- Bracket placement
- Sensor transfer procedures
- Model-specific requirements
Installation videos and official documentation can also provide valuable visual guidance throughout the process.

Key Takeaways for F-250 / F-350 Owners
A Ford F-250 or F-350 bumper replacement involves much more than swapping one bumper for another. Modern Super Duty trucks integrate advanced electronics, lighting systems, sensors, and structural mounting components that all play a role in the installation process.
For truck owners looking to improve front-end protection, durability, and functionality, a Ranch Hand bumper can be a substantial upgrade that better matches the capabilities of the truck itself.
Understanding the installation process ahead of time helps owners prepare for the tools, labor, workspace, and attention to detail required for a successful installation. For experienced DIY truck owners, the project may be very manageable with proper planning and assistance. For others, especially trucks equipped with advanced driver assistance systems, professional installation may provide additional peace of mind.
Frequently Asked Questions About Ford F‑250 & F-350 Bumper Replacement
-
How difficult is a Ford F-250 bumper installation?
Difficulty depends on the truck’s configuration and the installer’s experience level. Trucks equipped with parking sensors, adaptive cruise control, or front cameras are generally more complex.
-
Can I install a Ranch Hand bumper by myself?
Because of the size and weight of heavy-duty bumpers, having at least one additional person is strongly recommended.
-
Do I need to transfer factory sensors?
In most cases, yes. Many late-model Super Duty trucks require transferring parking sensors and other electronic components into the replacement bumper.
-
Will a heavy-duty bumper affect adaptive cruise control?
It can if sensors are not installed or aligned correctly. Always follow the product-specific installation instructions carefully.
-
How long does a front bumper replacement usually take?
Installation time varies depending on truck configuration, tools, and installer experience, but many installations take several hours from start to finish.